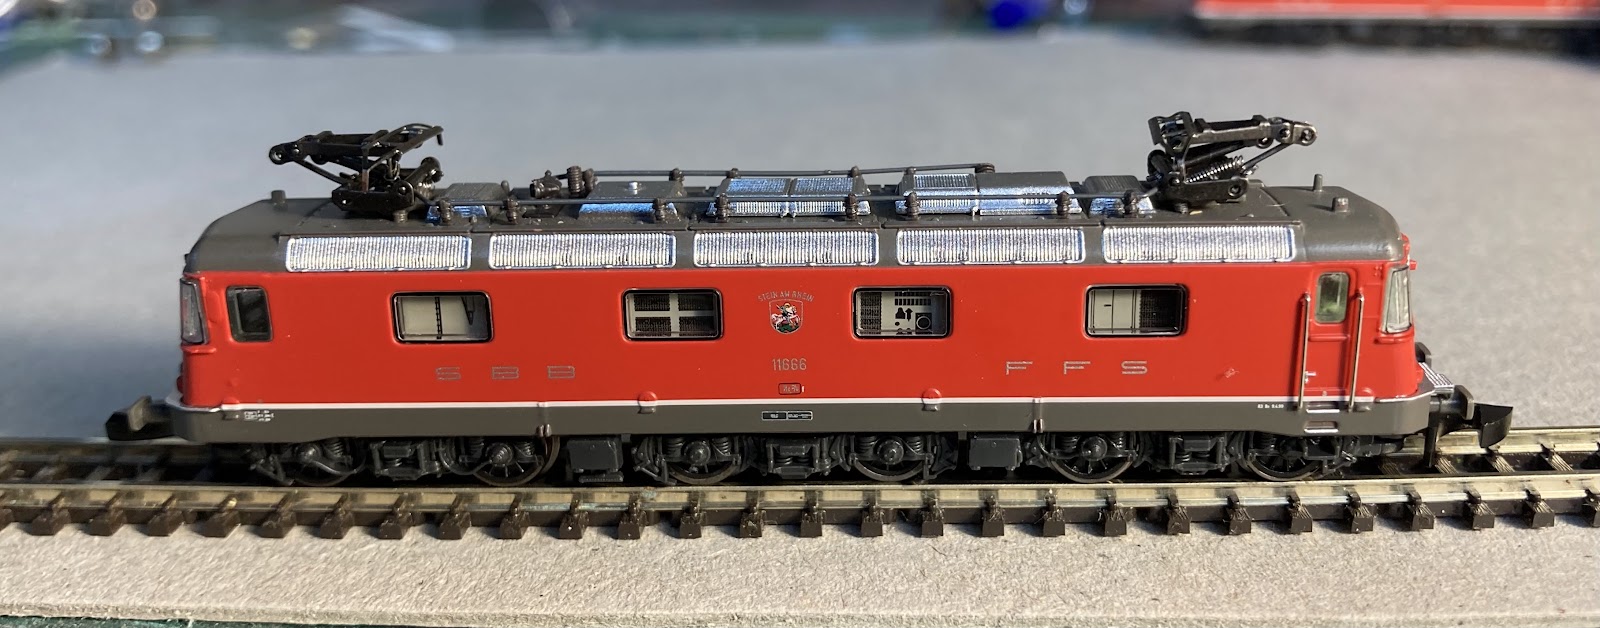
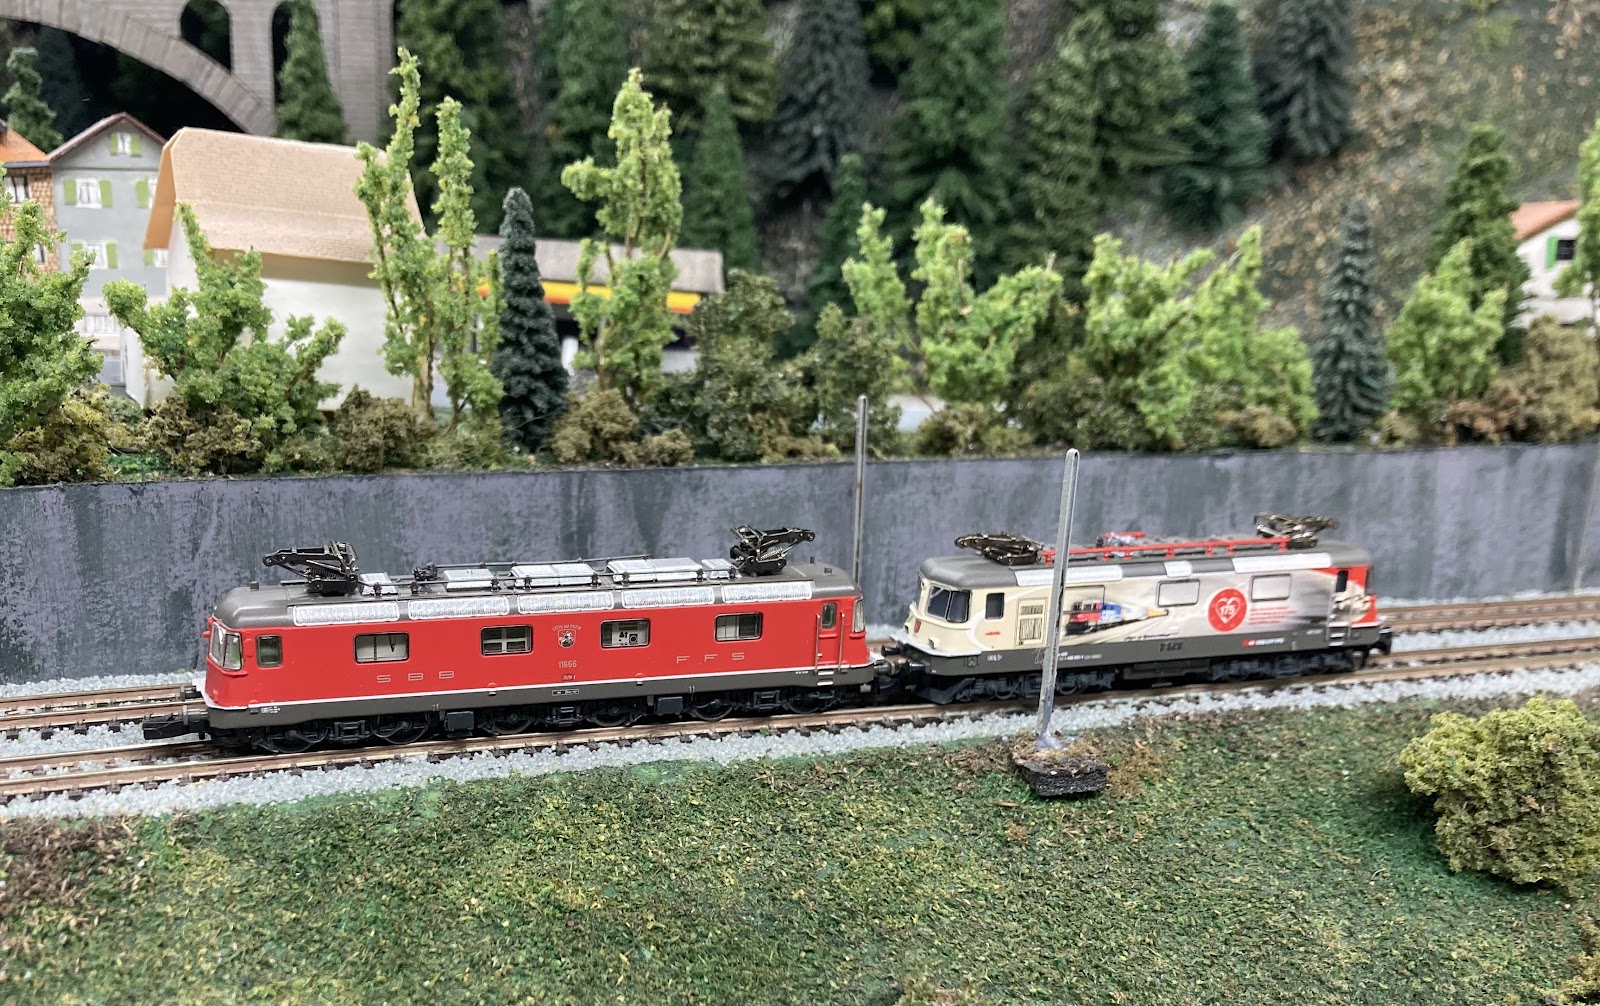
Can the superb new Marklin Re 6/6 be improved? Of course!
The chunky pantographs were quickly unscrewed and disposed of.
Looking at my pictures of Re 6/6s, the roof seems fairly silvery where it meets the red sides, and then usually dirties up on the top, especially around the pantographs. I assume they stay cleanish on the sides due to the train washing facilities. So the grey roof on the model was painted silver, except for the bits between the pantographs - because I knew I'd be making them dirty soon.
Some brown Tamiya panel line accent was dabbed onto the roof's side grilles as I've seen a few pictures of these looking lightly rusty, and I thought that might be something different to do in terms of looks. In hindsight I'm not sure I'm crazy about this and will probably go back over them with black accent.
Various shades of grey, dark grey and black then found their way onto the roof.
The aerials above the drivers cab (radio and GPS I assume) were painted very light grey. Nice that Marklin included these, and the UIC plug (?) between the front windows is already white. I put some Tamiya Smoke inside the side windows to darken them down a little.
You probably can't see it in the pictures, but I also added tiny red vertical strips between the main front silver window frames and the curved corner windows. I did the same on the Re 4/4.
As mentioned yesterday, the little side details between the bogies (air tanks and boxes) were very lightly glued in with come contact adhesive, as were the cowcatchers. I note that there is an ETCS shoe cast into one each of the side details between the bogies - attention to detail! The lower half of the bogies and those details were washed with a little brown. Most of the 4/4s and 6/6s seem to actually have grey weathering on the bogies - perhaps from use of sand on the way up and composite brake blocks that don't produce as much rusty-dust on the way down??
A little bit of this brown and grey ended up on the sides of the loco. As I have a second 6/6 on the way, I figure this one can be the 'second loco' behind an Re 4/4, and the other 6/6 will 'lead' a train with a 4/4 behind it. As such, I decided I would gunk this up a little more and add a little more detail (including a front cowcather/pilot) to the leader.
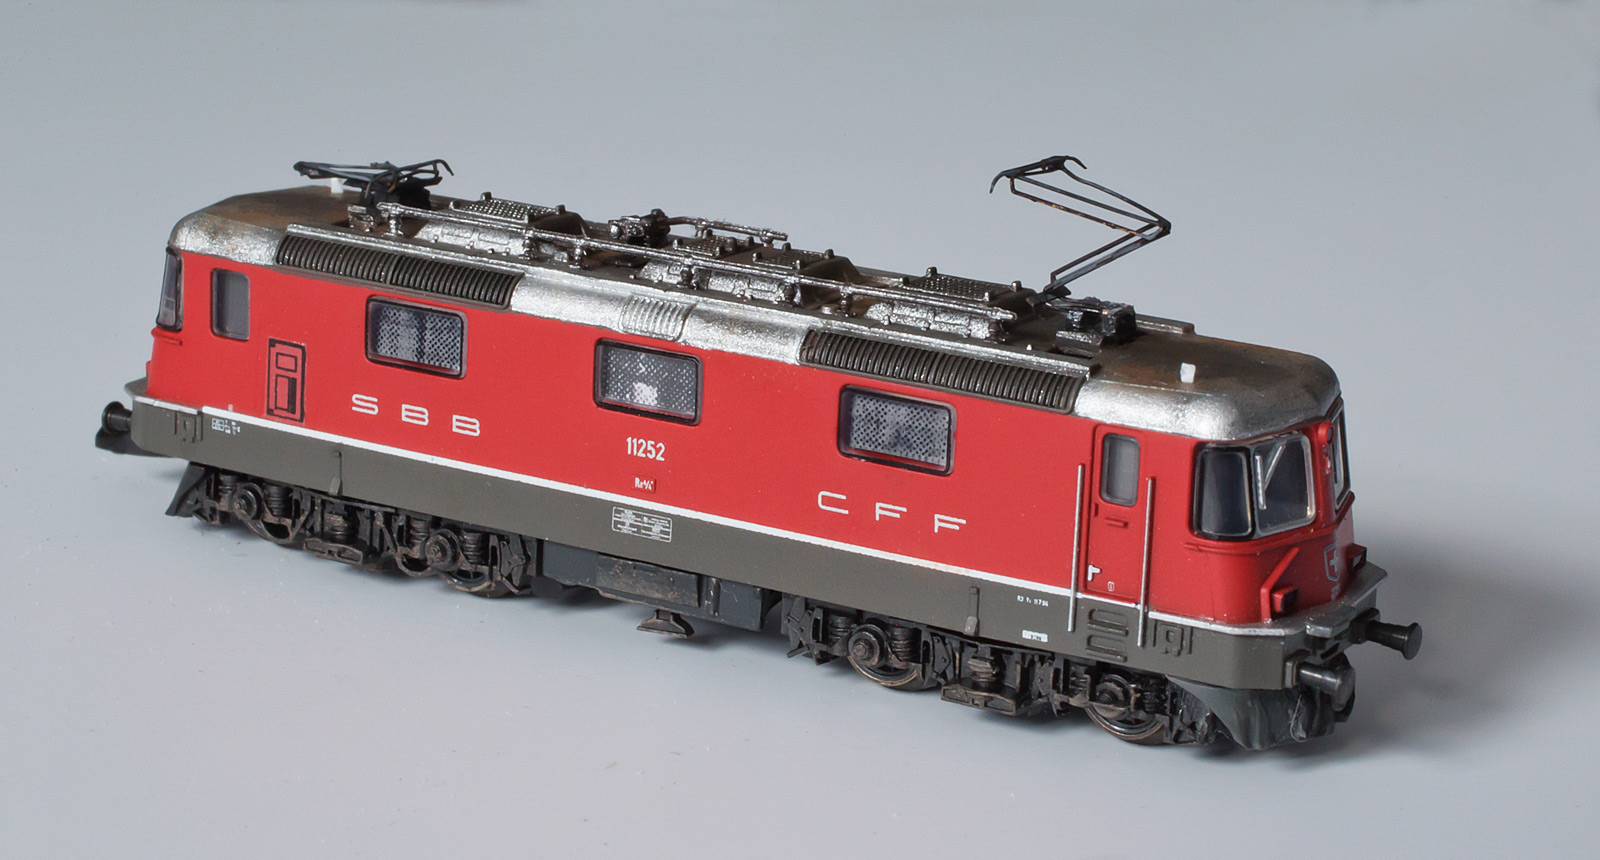
As with my 4/4s, it will be nigh impossible for me to change the side numbers and town lettering, but I could change the crest on the side. I was looking for a yellow one, but then found this number, ten less than 11666. Pic below from Christoph Herni on Flickr. I did attempt to change the numbers on one side with a blob of red to change the 6 into a 5. Not worth it! I painted blue inside the crest frame, and put three angled white lines across it.
After I'd done most of this, I added a set of etched pantographs.
So here is a closer pic:
And as it looked yesterday:
I'll probably revisit this again tomorrow and clean up a few areas.
Other things I might add to the 'lead' 6/6, once it gets here, include side mirrors, maybe a front step, that door behind the cab on one side, the little white triangle on the cab side doors, maybe some sun shades ...and a driver!
It's been a long wait for the Marklin Re 6/6 (announced more than two years ago), and for me, it's been an expensive exercise.
I feared I'd missed out when the one ordered at the NZ dealer came back as "item on backorder', so I ordered a second one from Z Scale Hobo. Plus a '175th' SBB livery Re 4/4 with a can motor, as I'd heard the new can motor locos don't run well with the old 5 pole cage motors. Plus a few new wagons with both locos. I'd better get a lotto ticket to pay for all of this.
So. A new design of white Marklin card box, and out pops Re 6/6 11666 “Stein am Rhein”, Marklin's item number is 88240.
It looks fabulous. The Re 4/4 was a superb model (except for the pantographs as have been mentioned in the past), but this is at another level. Freestanding handrails,tidy roof detail, detachable front skirt/cowcatcher/snowplows, and most importantly, this is the first of my Marklin Z locos where the chassis 'looks right'. Large diameter, nicely spoked wheels, a prototypically spaced wheelbase so the body doesn't overhang much at the ends, and most importantly, the body is hunkered down on the chassis in a way the Re 4/4 could benefit from. Not bad at all.
The pantographs, while still clunky, are painted black, which reduces their visual impact a little. I believe this is one of the first Marklin locos that doesn't take current from the overhead, which might upset some people with existing layouts (it doesn’t bother me). Given this, why not provide some fine injection moulded plastic ones in the box? One folded up, one down (and several spares of each to allow for breakages!) I'll be replacing mine with etched examples.
Compare the 6/6 and 4/4 bogies/trucks/drehgestell). On the real thing these are almost identical.
A proper Re 10/10!
Popping the top off, the innards look quite different to the 4/4s (even the new can motor-equipped 4/4). The body seems to be cast in a lightweight light coloured metal (? but it feels a bit like plastic). The pickups from the two end bogies are thin wires. I'm not sure if that is a good thing (no rubbing copper strips to get dirty) or merely something that can break. There is now a long circuit board on top. The little air tanks and boxes between the bogies clip in and out (and surprise you by pinging onto the floor the first time you take the shell off). I'll probably glue them to the chassis. The printed boxes and things on the side of the light grey chassis can be seen through the side windows to provide some interior detail, which is a nice tough, and there is cab interior at both ends. Again a nice touch, but that leaves little room for extra weight.
As god intended:
So how does it run? This is the first Marklin loco I have with the new ‘bell armature can motor'. It’s quieter and smoother than the old motors, but not as smooth or quiet as the Rokuhan unit I have. It was also reported to be a bit faster than the old motors - why didn’t they change the gearing so it would run with the old 4/4?! Grrrr. Then I further bolstered Marklin's coffers (voting with my wallet for poor decisions) by buying the 175th livery Re 4/4 which also has a can motor. Despite the top being of no use to me as that livery came out in 2022, after the Gotthard base tunnel opened.
Side by side, the two can motor locos run at different speeds anyway, the 4/4 a little faster, although they run together OK.
I'd also read a review saying the 6/6 was a bit light and wimpy, but I ran th 6 wagon boxcar train with no hassle behind the 10/10. The 620 was a bit jerky in places. I was surprised. It's a brand new loco, so it should be clean, and I cleaned all my track. Almost as if it was losing contact with the rails in spots (wonder if there is enough vertical movement in that middle bogie) and it felt like it got 'tired' the more I ran it!Maybe I just need to re-clean a few spots on the track. It certainly wouldn't hurt either of these locos to have a bit more weight.
So the 10/10 ran well enough other than the occasional herkey-jerky, but with two locos they tended to get past any bad spots. I swapped out the red and cream 175th livery top for one of my red tops for the video.
This first "running session" on Wassen in many years was a mixed bag. One of the levels of loops in the north end hill is too close to the scenery and the Transwagons (and other long wagons from the marks on the inside) scrape inside the paper mache, and on one occasion, they caught and derailed the train. Good to know, as I'm sure that can be fixed.
I then noticed that the new 6/6 ran at a similar speed to the old-motored 4/4s (Grrr!!!) so ran a big container train behind them, which ran reasonably well given its length. One container wagon caused a derailment by clipping a plastic tunnel portal (which was then opened up slightly with a knife blade). I also need to add more vertical clearance on the north loop somehow, as my nice pantographs were getting snagged. The points up top of the south hill seem a bit sketchy in terms of power delivery, which is a pain, but two locos will generally power through them.
With the long train of light wagons and little wheel flanges, sudden stops and starts cause derailments. As does backing the train for photo ops. So the session was a bit frustrating. I need to sort out some of these issues or the layout will just be an exercise in frustration. Fortunately, now that I've identified a few trouble spots, they can be fixed.
A few videos might show up if blogger gets around to processing them:
Finishing up the Re 460, I added some air hoses on my new lower chin, put a dab of red and white paint at the top of each hose to represent the operating cocks.
I also added a 'p' shaped fold of fine wire as a coupler and folded up some pantographs (remembering at the last second to put the 'up' one at the back). Yes, while the 460 originally had this style of panto, they have over the last decade or so been fitted with single arm top halves rather than the split arm triangular style on most of the other stock that I had etched up.
Not too shabby. The white window blind is quite visible on the front-on pic. I suppose it should have been a slightly creamier colour.
While looking at these pictures taken with my 'proper' camera - as opposed to the pics from my 8 year old iPhone that usually populate these dispatches, some impressive details on Marklin's model revealed themselves. Not only is the correct name 'Säntis' clearly visible in the full sized pic under the driver's side window, but the Pininfarina logo is also in place on the other side.
Neither of these I've seen with my naked eye before, so I must say, well done Marklin, this is a far better model than I expected it to be.
At some stage I might fit some lead weight into the top of the body in the hope of going it a bit more grunt on the hills.
While I'm not mad about the prototype Re 460 - the skirted Pinnanfarina-designed body is a bit Mr-Blobby for my liking - you might recall me being pleasantly surprised with my purchase of an old second-hand one from the UK.
Upon getting it home, I promptly painted over the '2000' numbering on the nose to reflect the current livery as reflected above. The '2000' was added to the prototype for the same reasons it was to the Knight Industries Two Thousand: because it sounded all futuristic back in the days before the actual year 2000 rolled over.
The obvious things remaining to be tackled are:
the round hole in the roof used for switching between track and panto power
the massive pantographs
the massive cutouts in the roof for the pantographs
eliminating one coupler and adding a front headstock/plow
And after an hour or so, some progress was made. Alas I descended to bowels of the train room without my phone, so no in-progress pics... and a few of the 'before' state had to be stolen from the internet:
Some thin plastic was added to the roof to cover the hole and build up the areas around the panto a little.
A white sunshade was added inside (below), and a start made on building the lower front apron.
The next job will be to finish that lower chin off with some detail and stick some etched pantographs on top.
Yes the roof is a bit dark on these models but I'm not sure i would do a great job repainting it without making a mess of it...
As a reminder, this is what it looked like previously with the coupler in place:
All 'looking' good, but now, how to actually get a speeding Rokuhan loco to run with a slower Marklin one...
I read on the magic interweb that you can take about .7 volts out of a wire using a diode, so 4 were soldered up in pairs and this did indeed slow the loco down a tad - enough that they run fairly comfortably together.
Experimenting:
As installed:
Then after some track cleaning, run-testing commenced. The first issue was the clearances between raised pantographs vs tunnel portals - this was quickly resolved.
As feared, the next problem was some uncoupling from the Re 6/6 on tight curves due to the long overhang of its body-mounted couplers. This was mitigated somewhat by clipping the wee 'uncoupling' nub from the underside of the coupler - on the sharpest curves this was hitting the outer rail and upsetting things.
But uncoupling remains somewhat of a problem, primarily vs the Marklin Re 4/4, as that loco is running slower and gets pushed in places, with its bogie-mounted coupler following the track line and the 6/6's sticking way out beyond the curve.
As an experiment, I put the 6/6 in front and because the 6/6 is a tad faster, the pair runs very well together with no uncoupling issues detected. Arguably the loco combination looks better too (from a distance!), as the 6/6 is a little taller than it should be. But of course this isn't what had been planned... is the 6/6 a good enough model to lead? I suppose it could be made to look a little better with more filling, painting and detailing of the nose, plus the installation of a pilot to replace the front coupler.
The other issue that has to be dealt with somehow is that my 'raised' pantos need to be lowered further to clear the fairly tight spiral in the south hill above the Wassen church just beyond where the above video stops...!
In February, when we last left the Frankenstein Re 6/6 - which you may recall was bashed out of a Marklin Ae 6/6 shell on top of a Rokuhan chassis - it had a couple of issues to be resolved.
The chassis runs too fast to mate up with a Marklin Re 4/4
The Japanese prototype chassis has shorter wheelbase bogies so the thing looks a little airy underneath
It has no pantographs (spare Marklin ones were balanced on top for pictures last time)
The chassis has Rapido-style couplers, and I need to mate this to a Marklin Re 4/4 somehow
The roof is a tiny bit too long, overhanging the front face slightly (mainly at one end)
Tackling these in reverse order.... The overhanging roof was something that was always going to bug me, so both roof ends were attacked with a Dremel and files to shave a tiny bit of material off, and repainted/weathered.
You can also see panto stands made from plastruct ladder on the roof
The coupling situation was resolved (hopefully!) with the arrival of Rokuhan snap-in Markin-style couplers. None of this Z scale stuff is close coupling, but as the 6/6 couplers are body mounted, it probably helps that the shafts are a little long. Hopefully...!
The original Rapido-style coupler circled in the above pic.
Pantographs were folded up and glued on top, and some boxes added between the bogies to fill the spaces somewhat. The real Re 6/6 has these boxes on one side and air reservoirs on the other, but I put boxes on both sides. As they are 'thin' in depth there is less risk of them getting in the way of the bogies moving about than thick round air tanks.
So that leaves one remaining issue :
The chassis runs too fast to mate up with a Marklin Re 4/4
Two more Re 4/4 shells have been undergoing a touchup in fits and starts, with a silver roof, painted front step, replacement etched pantos and some weathering on top completed so far.
Reprinted a/c units are yet to be added. These cellphone pictures reveal all the inaccuracies that my naked eye can't detect - must adjust some of the bends on the pantos on those two. Not that these details are so noticeable when viewing trains running around a layout from the federally-mandated viewing distances...
As I have five 4/4s, I think the next one that crosses my desk will be weathered more heavily, and there are plenty of possibilities for the last shell.
One 4/4 will be paired up with the 6/6, so that leaves either two pairs, or a triple plus a single I guess. Either way that is three sets, so two more chassis need to be worked to eliminate a coupler.
There were a couple of wee things that I had intended to add onto the Re 4/4 a long while back but I completely forgot about them in the interim. Must be my intermittent incredibly-early-onset dementia...
Firstly the air conditioners that sit behind the driver's position (near the front of the port side). These were retrofitted top the real things a decade or so ago; and I see that Marklin's recent 'Gotthard Panorama Express' set has an Re 4/4 included that actually has these A/c units printed on the sides, so here's a rare "well done" bouquet from this blog for them.
I figured I'd print an outline of these onto clear decal paper with my laser printer, but it took several frustrating goes at this.
My first effort in photoshop came out all dotty (600dpi, my buttocks). So, lacking any sensible vector drawing programs that I'm really au fait with, the accountant in me came out and doodled up something in excel.
I started out with some quite detailed ones, but when printed out to each be about 5mm tall they were all black blobs, so I simplified them and even now they look a bit strong. And now that I write this up they are a little small too, so I might do some more a little bigger for the other 4/4s.
The little white aerials over the starboard side of the cab roof were tiny squares of Plasticard glued on that will probably fall off on its first run. I also drybrushed the bogies and underbits lightly.
The very day I received my Re 4/4s, a plan was hatched to replace the big ugly Marklin pantographs with finer, non-functional, etched examples.
Sure, etched ones won't go up and down and they won't collect current, but... I don't need them to. I just need them to look better.
As can be seen here, the real things seem almost invisible:
A tad finer and more petite than the model below. Note that the big current collection shoe is almost the full width on the model compared to the proto:
To be fair, the Marklin panto had to be engineered sturdily-enough to operate up and down consistently over a long period of time in the gritty and dirty hard knocks world of model railways; and be wide enough to collect current over the imperfect, tight, wobbly track and catenary setups that are possible on Z scale layouts. Although I'd wager that only a handful of people actually use the overhead current-collection option on marklin layouts. Indeed reading between the lines on a recent Marklin release makes me wonder if they may drop this option in future.
But be that as it may... the plan was to etch some replacements, and the above was drawn in Sketchup eons ago based on a closeup crop of one of my pics:
And after several years of sitting on this, I finally got a mate who is good at this sort of thing to set it up and get a prototype etched in Phosphor Bronze for me by PPD in Scotland. This material is stronger than brass and should be able to take the inevitable bumps and knocks better.
Well, don't those look fine and dandy? I don't own any 'Blacken-it' chemical etch or gun blue, so applied a low-tech Sharpie black marker pen to them instead before getting out the pliers.
Folded up:
It took about 5 minutes of prodding with pliers, tweezers and confused looks to do this one, so I will refine my technique as I become more familiar with them, which will result in a 'neater' appearance as I had to bend and rebend a few things.
The phosphor bronze is certainly much more forgiving than brass, and much stronger indeed. You may notice that I folded the lower support strut the wrong way too...
It certainly looks a bit more scale than the old ones... More fiddling will follow.
The next obvious thing to tackle on the Re 4/4 is the couplers situation...
Now I'm actually OK with the big, horny, clunky, Marklin coupler in general. It may not be pretty, but it does the job. Changing them all to Microtrains would be a big time-suck and an expense for little improvement in looks and no improvement in functionality - indeed they'd probably be less-reliable with my luck.
As for their clunky aesthetics, I don't actually think people will be peering up close between the wagons on a layout like Wassen, so the only horrible Marklin coupler that it really makes sense to fret about is the one at the front of the train, as that is where most people look.
Obviously I don't need a coupler at the front of a lead loco, as I'm not running around trains or doing complex bidirectional shunting moves (I doubt many people are in Z scale...) But most of my trains are double-headed, so some locos need couplers at both ends.
So the plan is to remove the coupler from one end of a few of my locos and replace it with the 'pilot/headstock/cowcatcher' at that end.
If this was done cleverly, the pilot would be attached to the chassis rather than the bodyshell. This would allow shells to be swapped out so that, for example, my blue SBB Cargo 4/4 might sometimes be seen in the lead and might sometimes be the second engine.
So one of the bogies was detached from the chassis and it's coupler removed. Some of the cast-on pilots and a little extra plastic was removed from the front corners of the bogie to provide more clearance between the bogie and my new pilot while swiveling. You can see the angled pilot faces carefully glued to two rectangles of styrene in the corners of the chassis below.
This means there are no issues with bogie clearance, but if there is a collision, the thing is going to come adrift. Perhaps some tiny screws in the corners (or even some brass rod) through the chassis and into these blocks might make things more likely to survive future altercations.
The curved corner pieces being made up from styrene pipe:
And attached in this blurry pic:
A few bits of (grossly oversize) brass wire later:
Hardly dramatic, but it looks a little better closeup. Next time the detailing might be a little finer...
As you may have noticed, I tend to model at a million miles or an hour or at zero.
The ETR 610 has made some progress, but it hasn't been a tsunami of progress that keeps me motivated. It has instead moved very much from one stumbling point to the next.
So in the hopes of restarting in Z for a short while, I have had a number of ideas on the back burner to improve the looks of some of my locos.
Let's start with the Re 4/4. For Z scale, this really is a superb model that is crisp, well-detailed, well-painted, and most importantly, conveys the look of the original with only a few compromises to fit with the Marklin 'system'.
Two main things stand out as needing improvement:
The massive silver pantographs - these look better in the factory dark chrome on my BLS locos but I expect one could do better...
The massive coupler sticking out the front.
In addition there are a few quick and easy cosmetic things that could also be tried. For example, Zettzeit.ch has some 'machine room' interiors that you can print out and install behind the three large side windows.