Saturday, April 20, 2024

Shell Wassen

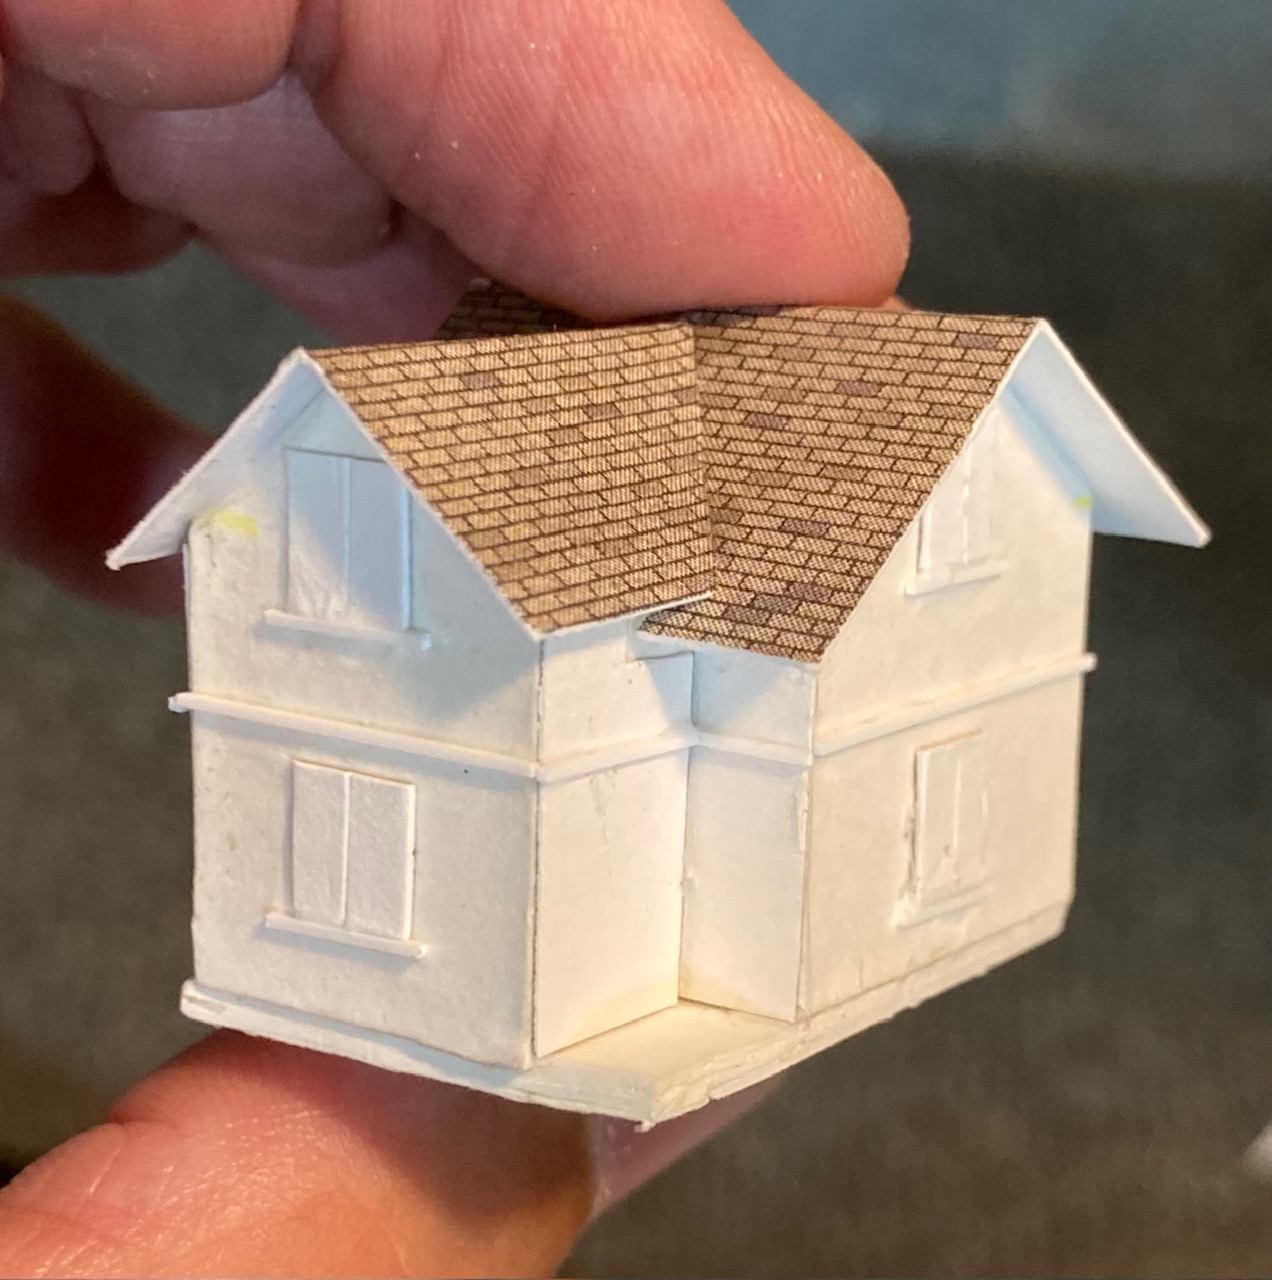
Today I had a crack at the petrol station alluded to in the previous post, and to my surprise had it glued down within two hours.

The real thing has a wooden upper floor on a concrete block lower, with an angled extension out front that I declined to model, out of both laziness and a lack of space.


For the top half I used some grossly overscale but decent looking faller card sheet, with an overlay of roof-slate-printed Faller card for the bottom concrete blocks. The black bits are for the big windows downstairs.
And overlaid:
The 'concrete block' bits were overpainted beforehand with a light grey so the detail would still show through, and the roof later painted darker, as these were made from the same card material. 
As usual, its all a bit hokey and out-of-square, but it looks OK from a distance.  The canopy sides were painted yellow and some red decal stripes added. I considered putting 'Shell' and Mattli' signs up, but I doubt they would want to be associated with such a crooked model.

Under the canopy are some white pieces of wire poked into the foamboard road and a few bits of plastic rod for petrol pumps. If I wasn't so lazy I would have put some red and yellow on them before sticking them down.

Thursday, April 18, 2024

Wassen Gotthardstrasse

 I intended to make the Wassen Shell service station today.

After making a start on the yellow canopy, some time was spent pondering about how big the building should be, and where it should all be located on the layout. 

To do that it made sense to see where the road goes.

To do that I might as well put down the road. 

To do that I needed to put the sidewalk and buildings down. 

So the (incorrect for Wassen) cobblestone sidewalks went in, almost all the buildings on the far side of the road (except the Alte Poste) were glued down, a little scenery was added behind the gaps, and the road went down. A drill bit is holding down the schoolhouse in a near-vertical position.


The main bits of road on this layout were made from Faller Z Scale crepe roading. But that ran out, and it's hard to get Z scale roads here. Here, I used some larger scale stuff, trimmed the width of the side lines and drew in middle lines with a white pencil. This was then extended up towards the right side of the layout, tapering a little at the far end under the church, as that will be hidden by buildings and trees.

The Shell station canopy is the triangley bit. With the roads and basics in place, I can start adding soem more buildings. Starting with the Shell, and probably the obvious pink building in between it and the existing buildings.

As an aside, I see the Alte Poste hotel shut down in 2019 and was for sale. It seems silly, but I expect that a lot of their trade was railfans, so they can probably blame the BasisTunnel for there now being too many rooms in Wassen.

Wednesday, April 10, 2024

Obere Wattinger Fin


Two outstanding items in the transformed Upper Wattinger corner were some piers/supports for the road bridge, and the little house/track maintainers house/signal house/I'm not sure what these are, but they are littered around the trackage at Wassen.

This hut was made out of some thick white cardboard that was lying around.

A bit of artistic license was employed to have it fit the space available. 

This end (that everyone sees in pictures of the real thing taken from the road) should have a different roof profile and be wider, but had to be condensed to fit the space.

I had a pic of it on my computer and thought it had yellow window shutters and red/orange window sills, so this is what I did, but those bright colours stood out and drew too much attention. 

I pondered this overnight and found another picture with light green shutters and grey sills, so today I recoated these items and it looks a bit more subtle. I don't want any of the horrible bits of the layout (all of it really) to stand out and kick you between the teeth, I'd rather have the trains be the eye-catching elements.

I also painted the 'wooden top floor' parts of the house as it appears in photos. This makes the place look a bit more interesting and less stark white.


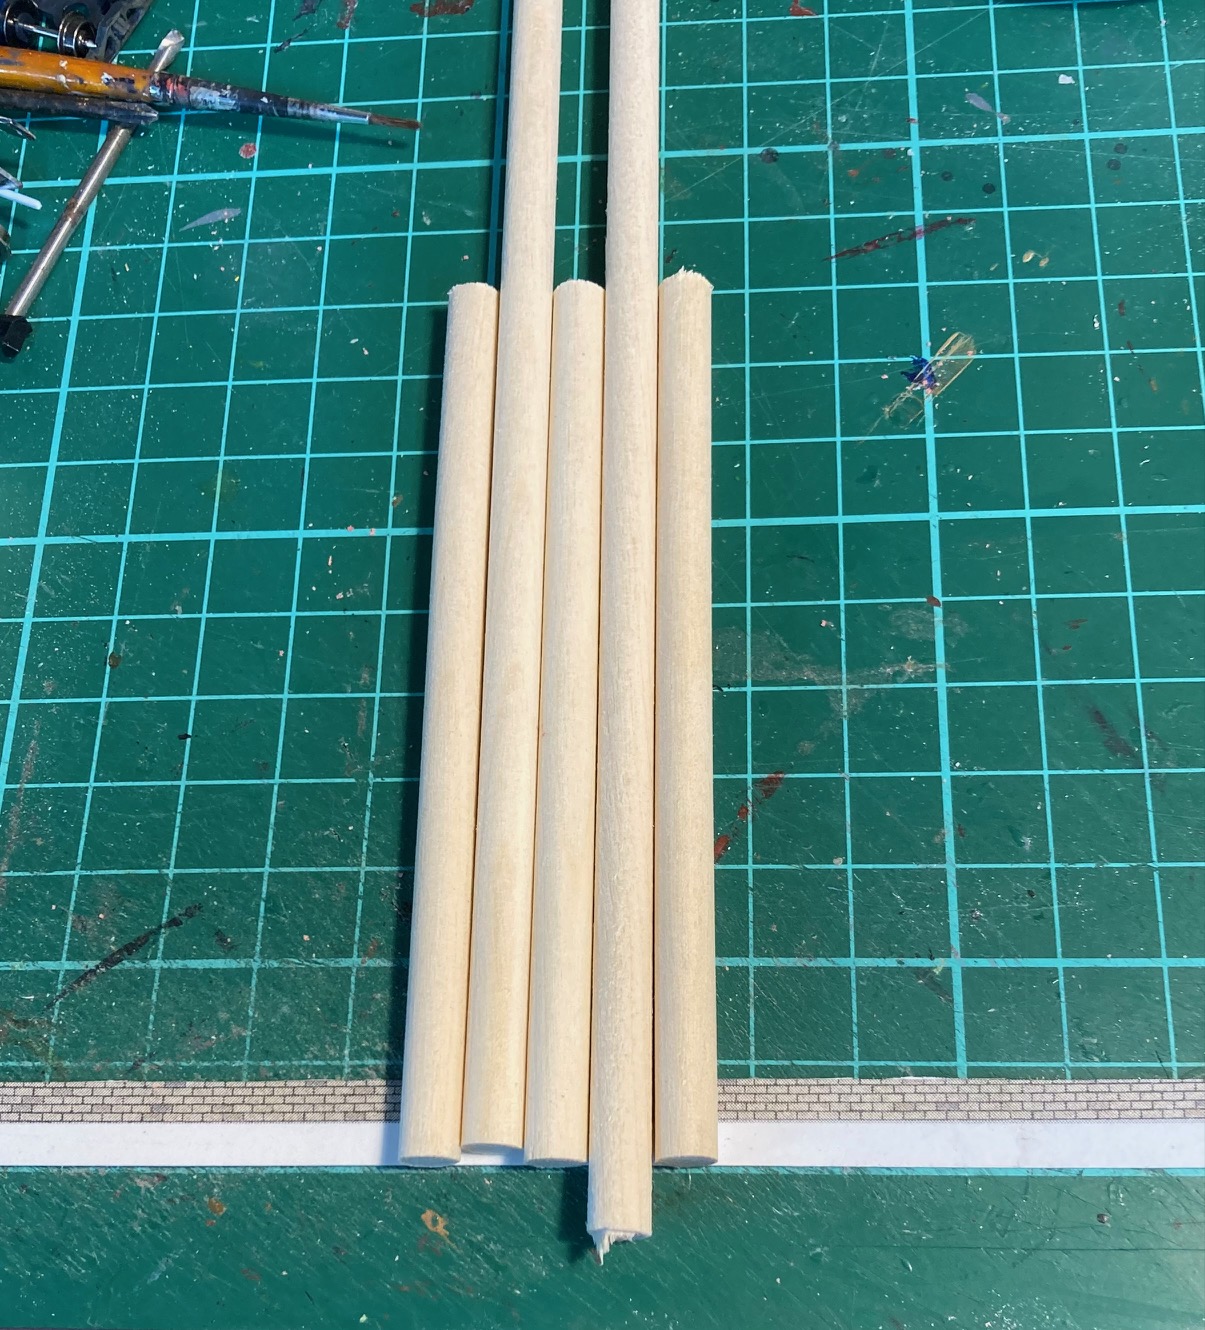
As for the bridge piers, I was looking for something with a rectangular cross section to make two columns out of, but unfortunately we don't have a lot of hobby supplies in our town. Then I thought why not use drinking straws. These might have buckled and gotten out of alignment, but even before that fear had entered my tiny mind, I was passing through a local dollar shop when these wooden dowels jumped out at me. Perfect. 

I cut three sections to fit under the road bridge and used two of the (longer) offcuts as spacers between the columns to keep everything separated and parallel while the whole pier was assembled. The three short pieces were glued to a thin strip of card...

And then the card was folded around to form a 'capping' piece. The attaching was done with PVA wood glue, making sure not to get any glue on the spacers. As seen here under a glass of water that was being used to hold the card down while the glue sets: 

The spacers were then pulled out and discarded, and the 'structure' painted with a mix of greys that looked concretey. The piers were glued in and some rocks placed around the base:


The house hasn't been glued down and scenicked yet. 

Tuesday, April 9, 2024

Regunking the EANOS

While I was pottering away with the scenery on North Wattinger, someone posted a picture on Facebook or somewhere of a nicely weathered SBB EANOS wagon in HO scale, a bit like my pink Marklin Z one. 

So using his one for ideas, I dug mine out and added a little more rust and dust and grime on top of what was already there - looking back, I'm not sure I have ever posted anything about this wagon. 

Some ordinary thinned acrylic paint plus some rust and grime washes were used. It looks a bit overdone, stark and harsh in these closeup pics...


...but looks OK from the mandated viewing distance below (pic from the previous post on North Wattinger).


I didn't like the pink colour scheme originally and was going to repaint in grey, but the pink has grown on me as it is something a little different.

The load that came with this has always looked a little boring, even with some additions on top of the factory load, so I might make it carry logs one day.

Saturday, April 6, 2024

Finishing up Upper Wattinger

I didn't take many decent pictures of the work done here, but Upper Wattinger is now largely done. 

From where we left off, the last of my various remaining pine trees were planted, along with some new fluorescent green trees that still need to be dulled down, and various other bits of scenic fluff were added.

My approach with scenery has always been to 'vary and layer.' Various means using many types of trees, foliage and colour from different manufacturers. And layering meaning that there is a base layer, which on Wassen is usually a dark green paint layer with some scenic 'grass' or other  ground cover applied. On top of this is often placed a layer of that scenic 'netting/web' that has bits of fluff attached. Made by Woodland Scenics or Noch, when teased out, it provides a nice 3d effect. On top of that go trees and bushes (foam clump foliage from Woodland Scenics and Fine Leaf Foliage also from Wodland Scenics, plus any old stuff I have lying around). 

In the really hilly bits here I've tended to put the base layer in, plant trees, then fill up the visible gaps with scenic fluffnet or clump foliage, and then detail with the odd filigree tree or grass detail (Silflor and other makers). Again always trying to mix up colours and textures so it doesn't just look like you've dumped a single bag of model scenery on your hills. 

I keep a box of scenic bits when I destroy a layout, so I use these recycled bits to fill up gaps and provide variety. I even have some old rubberised foliage that must be 30 years old. It looks terrible (it was probably the shizznit back then) but is fine when used sparingly under trees and filling in distant holes.

In another first for me, I tried weathering the ballast. To support a local hobby shop, I picked up a "Rail Weathering" box of Lifecolor paints (Italian?).  Using  a thinned mix of 'Sleeper Grime' and 'Brake Dust' brushed around the tracks, with some 'roof dirt' to simulate shadows in the tunnels. I reckon this looks pretty decent for a first effort so will have to do it on the rest of the layout. The Gotthard is a steep double tracked line, so I intended to make the downhill track more 'yellow/ brake brake dust' for brakes and the other darker for hard working grime and sand, but in the end thought it better to have them almost matching. It certainly helps tie the lighter Rohukan ballast colour into my Peco ballast, which has a slight blue tinge. The two pics below were taken while the mix was still wet, so it looks more subtle when it dries.


As a final touch, the river was added, overhead poles were added and painted, and a few other bits of grass added along the riverbank. There are a few tiny patches in the forest that need to be attended to, and that road bridge needs some concrete piers, but this looks pretty decent. Certainly better than it did. 

As a reminder, this corner is the only visible part of the layout made from tight fixed radius curves, which were necessary to get the geometry to work! The click track is easier to get smooth tight curves in than flextrack - especially at the joins!