Friday, October 26, 2018

A Bridge [Even Further] Too Far

The upper and least well-known of the three bridges in the tributary Meinreuss gorge above Wassen  is the top level railway bridge - the Obere Meienreuss-Brücke. This crossing isn't terribly visible unless you go out of your way to find it, being well hidden in the deep gorge, surrounded by trees and sitting between two tunnels.

A pic taken on my first visit to the place in October 2015:


The distinctive (fairly recent) recent tunnel portal extension poking out of a dramatic dark rockface is prominent - this presumably shields the line from rockfalls. Although the bridge takes shape here, the other elements have yet to be modelled here (and may never be!!).

The bridge itself appears to be quite a modern concrete one with minimal stone decoration about the various arches. I decided to make it (rather un-prototypically) from some z scale prick-embossed plastic sheet.

As usual, a bit of random drawing was done ono the sheet with a fine marker until it looked about right (here using a plastic tub and the inside of a roll of solder to provide appropriately-sized arcs) :


And then it was cut out:


Trimmed to fit and a concrete top piece added (the VGB Gotthard book gives a decent picture of what the thing should be like, so I'll give myself a B for this (and would have scored higher had I bothered to paint more of the face a concrete colour:


Weathered lightly and glued in place among the growing forest of trees:


Being the lazy modeler that I am, it's only single faced of course, just like his little brother road bridge), but hopefully a few more trees will grow to hide that fact that there is nothing behind that face, and I'll come back to the tunnel portal and catenary poles later.

Tuesday, October 23, 2018

Lost in a Forest


The Meinreuss gorge and the hills around it have a few trees on them in the real world. More than a few actually, so now that I have some base scatter undergrowth in place on my Z scale Wassen, it's time to do some arborealing.  What a great word I've just made up

I'm using a mix of trees here, based on what I have come across in shops and auctions.

  • The leftover JTT bluey-coloured pines from a local hobby shop
  • A fancy box of 40 Noch pines of a yellower tinge covered in superfine foliage
  • A box of 100 el-cheapo Heki unflocked pines

At least I think they are pines. I know they aren't cacti...


That's a start being made. My general process is to use an old round dental pick to gently poke an appropriately-sized hole into the scenery - some of which is firm, but some is merely PVA-coated phonebook-papershell. An appropriate tree is selected, it's trunk bottom might need to be reworked or pruned of foliage (especially the Noch ones, but more on that for another episode) to ensure it can plug into the hole.

Often, the bottom skirt of foliage might need to be trimmed, especially if the tree is being planted on a steep hillside (in which case a side is chopped off per the below), and in this case the bottom of the trunk might have to be bent thus so it can plug horizontally into a vertical cliff face:


A generous blob of PVA is applied to the base of the trunk and it is plugged into the scenery. Some trees might have to be encouraged to stand up straight with cardboard props:


But once they have set, they can be gently straightened by holding the base with fine pliers and bending the trunk up. Below is a work in progress as there's nothing worse than having your trees all listing at haphazard angles...

Sunday, October 14, 2018

Bulk Scenic Update

An update on the ongoing periodic dribble of scenic progress over the past month or two, as I don't remember where I left off in my dispatches...

  • The church is in, but you knew that already
  • There's a bit of foundation scenery going into the mid Meinreuss gorge area before tree-ing
  • There is a road bridge in that gorge too. I used one of the cut-stone-style ones printed out for Wattinger. This one probably should be a concrete arch bridge, but it will be hard to see in there when the trees go in. 
  • The hill in the distant corner of the pic below has had a bit of foundation scenery and mid-foliage added
  • There's a wee bit of foliage and tree scenery by the (unfinished) tunnel portal at the far end of the middle level and in the Wattinger gorge under the road bridge
  • But the main news.... (ta-da) is that the middle level has finally been painted and ballasted

Painting rails is a job always dreaded, and this was a fairly long stretch, but I put some music on and just plowed through the four rails-worth of work with a small paintbrush a week ago.

As you can see (or hopefully can't see) below, this time I remembered to add in a few fake sleepers under the rail joints. I always forget to do this on layouts and then grizzle about it later, as it looks so obvious when the ballast goes down.


Slow, but notable progress. The ballast really makes things look a lot better.

Saturday, October 13, 2018

Spiny Sgnss


I thought one of these empty 'skeletonal' Sgnss wagons might show off a tanktainer rather nicely. If you deploy Mr Google's image search, you will quickly see that there are many, many varietals of this class of wagon - I guess every manufacturer in every country has slightly different ideas around number, size and placement of beams, bracing, brake gear and overall form while sticking to the standard size and the placement of twistlocks.


Many, many moons ago, when I had the loan of a friend's Dremel, I had a buzz at one of my Marklin bogie flat chassis like so:


A few ugly incisions with a cutting wheel opened the thing up (albeit in a pretty messy way). Nonetheless, with a few distracting elements made of paper along the top, and a 20 foot container (shortened from a 40) to cover one end, plus the tanktainer on the other:


It's starting to come together.

As an aside, I did have reservations about using this Marklin chassis rather than making my own, for these are really a tad wider than they should be - with the side sills sticking out slightly beyond even the overweight AZL/MicroTrains containers. Ah still, hopefully nobody will notice when it is inserted into a train.

Additional paper underbraces (I'm not sure paper is such a good idea either, (nor the PVA used for welding all this together) but I'm hoping a good dollop of paint will ensure things stay stuck together.

Deep in the bowels of the main wagon frames were added some 'brake reservoirs' made from old black sprue and something I'm rounding-up to 'brake cylinders and detail' that came off one of those yellow Schauffele dump cars that are all being turned into intermodal wagons:
 And with a lick of green (I don't know why I chose green, but why not...)
I've painted green 'detail' onto the solid ends of the wagon at the tanktainer end as these might be visible though its structural bracing. You might note that the Bertschi tank has received a few random bits of walkway and detail on its top. The red 20 footer has had a razor saw line and two holes added on top to match the other end's vastly overscale details. You could lose a foot or even an entire leg in those twistlock holes.

When the green has set I'll have a go at adding some twistlocks and other details to the outside before sticking the containers down.


P.S. Thanks to Carim Z for the comment on my slow running Alpinist - I will check out that idea. For some reason I don't seem able to reply to your comment with a thanks, so: Thanks!

Tuesday, October 9, 2018

Tanktainers in Z Scale


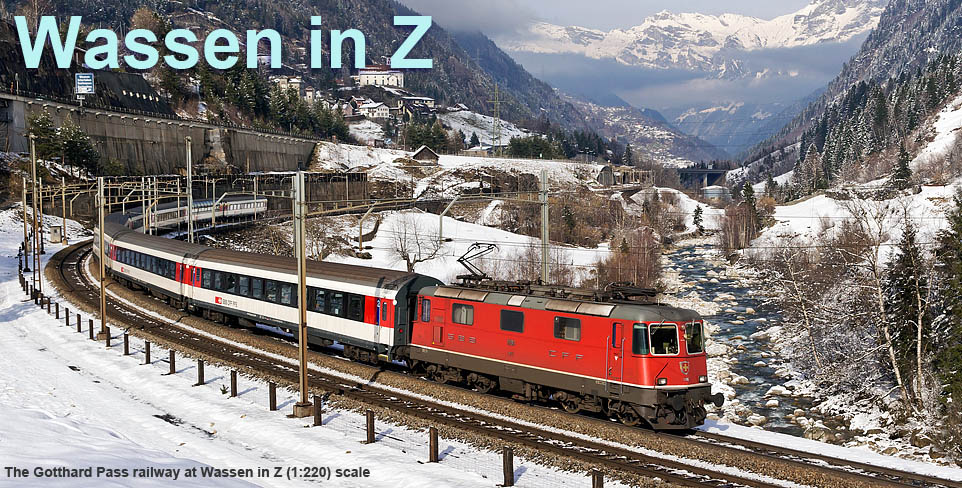
I've always wanted a few tanktainers in my intermodal train, and they were reasonably common on the tracks around Wassen in the good old days - as one of my Wattinger pics taken in 2015 attests. As can be seen, the prototypes come in various lengths and the bracing and tank shapes take many forms.

For a year or more I've wondered about using styrene tube or bits of old plastic pens for the tanks and building the frames out of Plasticard, but then someone called Ngineer goes and puts a pair of 20 footers on Shapeways at a reasonable price. And that's hard to resist.

The parcel arrived promptly. It's been four or five years since I've ordered anything on Shapeways, and these seem to be of much higher print resolution - thus exhibiting far less visible strata - than those early examples. Possibly this is a new material too.


The downside is that there are a few warped bits as you might see in the above pic (before the pair were seperated). I'm not sure if this is due to the material, or heating in transit, or squeezing in transit, or possibly the designer expecting too much of the thin and flimsy unsupported material. The latter might explain the long top rails, but that there are also kinks in some of the short lower struts but not others make me wonder if this print might have been removed and mis-handled too quickly before it really hardened.

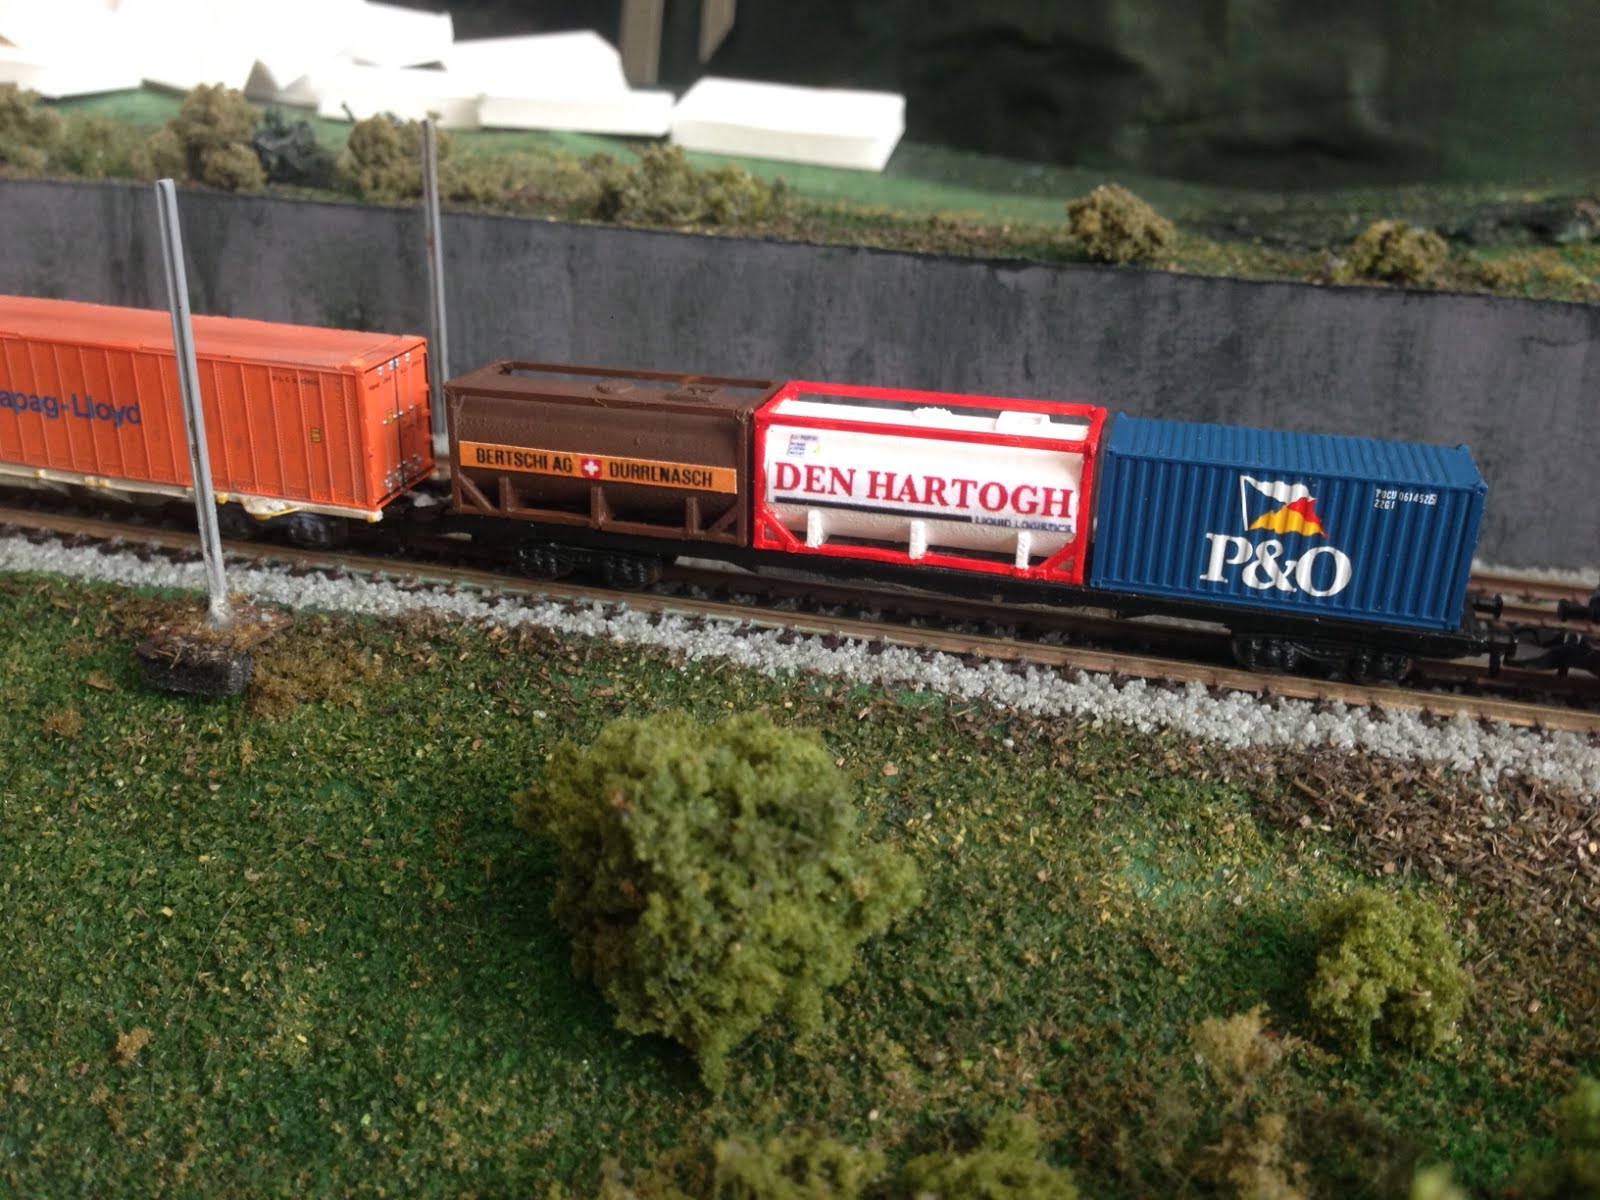
Interestingly, these tanks are a similar size to the Rokuhan Z scale 20 foot containers (in blue below) - which are noticeably smaller than the Microtrains or AZL American doublestack behind. Heights vary, but an ISO width should be an ISO width in Z scale, so the products of one of these two camps aren't to scale. Must have a measure one day.


The offending pre-mentioned saggy bits were removed, and some paint was slopped on:


Replacement framing from thin styrene strip being installed:


And that was as complex as I decided to go for now. Roofwalks, ladders and railings might be added at some later stage.

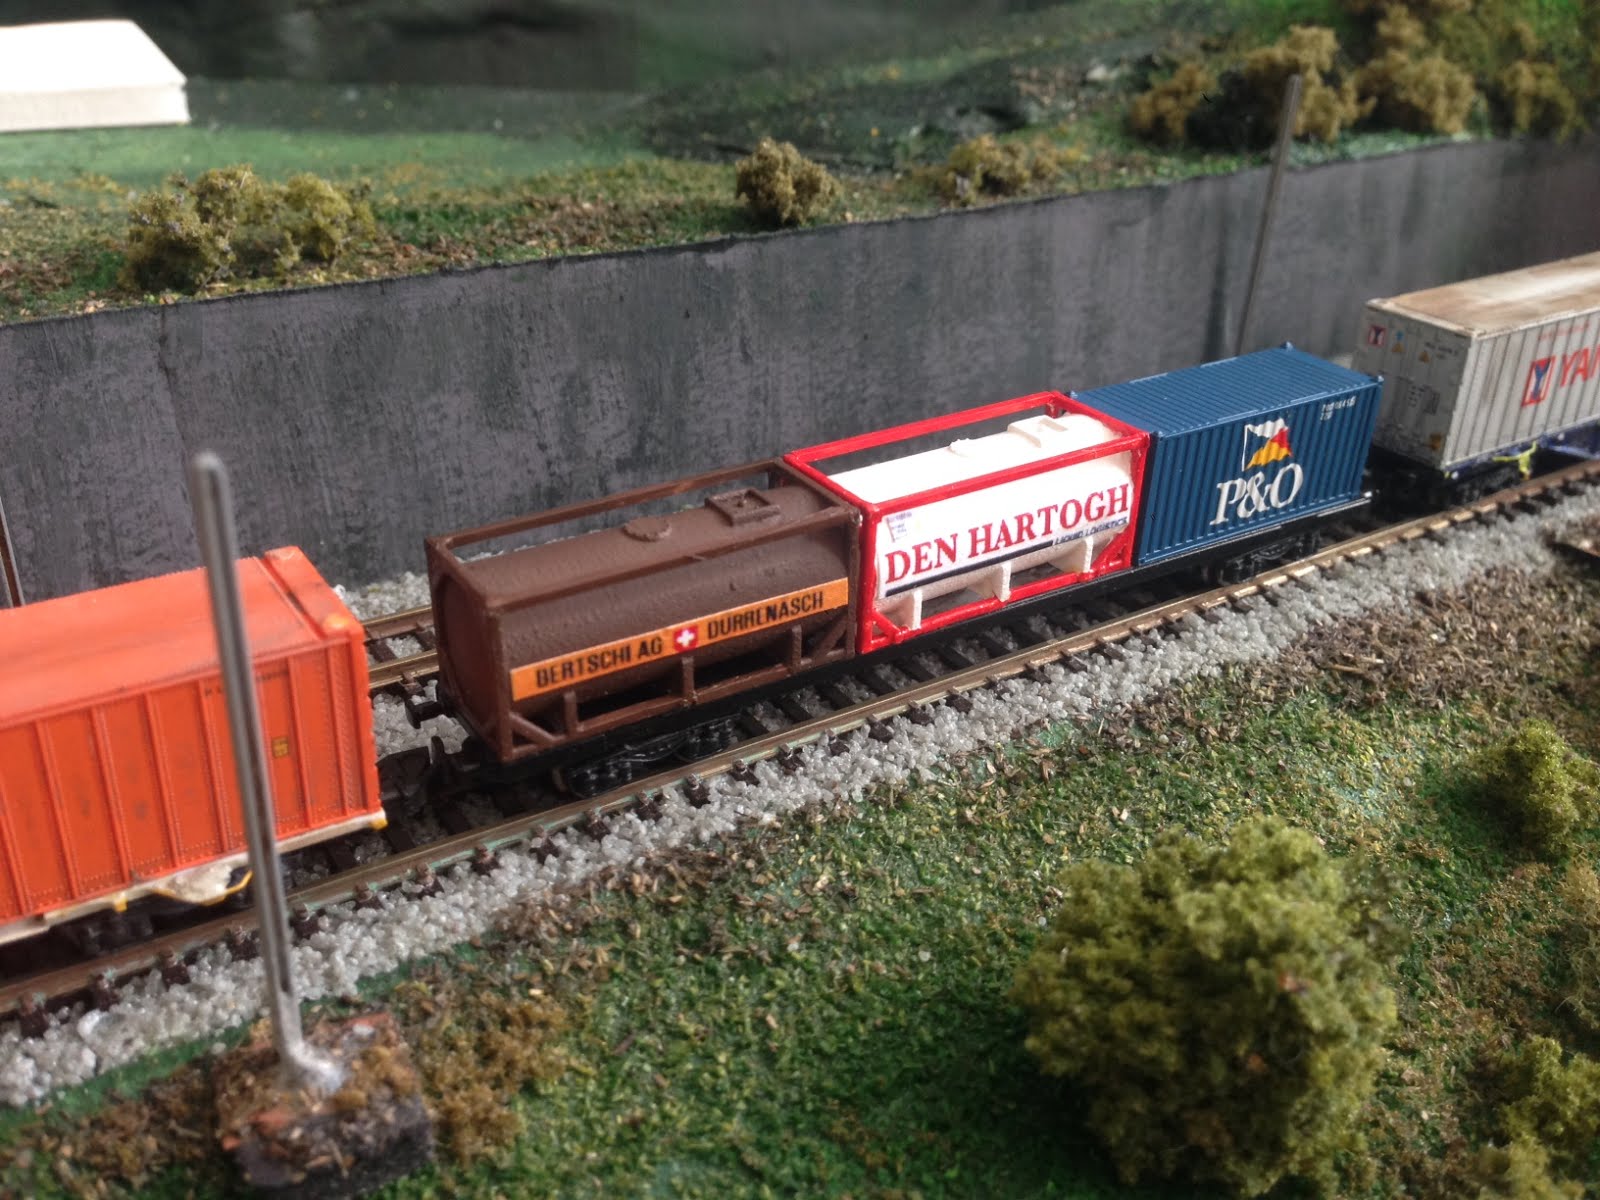
As for prototypes, I've had a Bertschi and a Den Hartogh in mind for a while now, and had doodled up some artwork for them a long time ago. This was printed out on a colour laser printer today, cut out, glued on, and voila's your uncle.


Decals would have been better than a thick sheet of printer paper of course, but not dramatically so for those of us that vigorously enforce the mandated minimum viewing distances, and this worked out pretty cheaply as I printed off a few other things on the same sheet (plus spares of these in case of screw-ups or if more are desired in future).


The finished-ish containers are perched here on a Marklin flat chassis with the blue Rokuhan 20 footer for the pics, but these bits will be made into a 'proper' wagon at some stage.

The Bertschi brown should be a smidge redder, but I can live with that for now.

Monday, October 8, 2018

Wassen Church Update

I made some clock faces for the church.

Well, I cheated a little, as they were 'borrowed' from a picture of the actual church on the interweb, which was photoshopped a little, printed out in multiple, and glued on with PVA. The printer at the local printshop has a different colour red to that on my screen of course, but it's close enough - and on the plus side they are quite nicely detailed, being scaled down reproductions of the real thing.


The real church doesn't have a clock face on the end facing the motorway, but fearing that might make it look like one of my model ones had fallen off, I've got all four sides of the tower covered in clock faces.


They were printed on white paper, and I cut out squares rather than trying to cut circles around the black faces. That white background is a slightly different colour to my creme coloured church, but it's not really noticeable, even in these pictures, which tend to show all the other glaring faults.


Such as, for example, I have no main windows on this rear side which faces the backdrop.....

Nor is there likely to ever be a proper tunnel portal down there - I'd rather be able to stick my hands in there for track cleaning within the tunnel