Saturday, July 28, 2018

Catenary Poles for Wassen's upper level

Ta daaaaaa....  

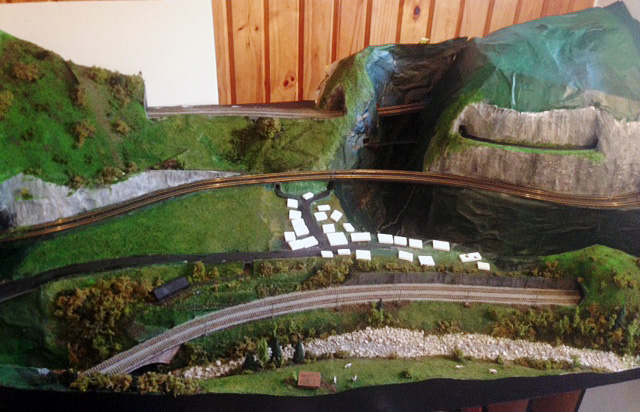
Looking more complete (the white bits in the scenery are glue that hasn't dried yet)

The upper level at Wassen is looking tidier with the backdrop in place, and now some overhead support masts have been added to insert some detail into the scene.

As I'd done for the lower/Wattinger/Reuss level bits that have been scenicked, I built the overhead support poles for the top level from brass. Posts being made from rod,  bases of thin shim and all soldered together.

The base means you have something to glue down and to scenic around, but the solder joint and brass makes the thing reasonably impervious to breakage from knocks (while cleaning the track and so forth). Plus you can bend the joint within reason to get the posts to be vertical once everything has set. I have yet to be tempted to append detailed arms off these as that might make track cleaning a nightmare, but we shall see if I change my mind over time. At least having the vertical poles gives an impression of the overhead and its all a bit more subtle than the chunky Marklin offerings.

As to building them...

Not being able to find H section brass in a small size during recent travels, I went with a C shape that I picked up in the Whistle Stop in Pasadena. I like the shaped channel rather than using a 'plain' square rod to add a little more intricacy to the setup, and as it is only visible from the front of the layout, it doesn't matter that it isn't an H shape . The C it is a little smaller in cross section than the H used on the lower level. I also made them a little shorter to enforce a look of forced perspective as you look into the layout.

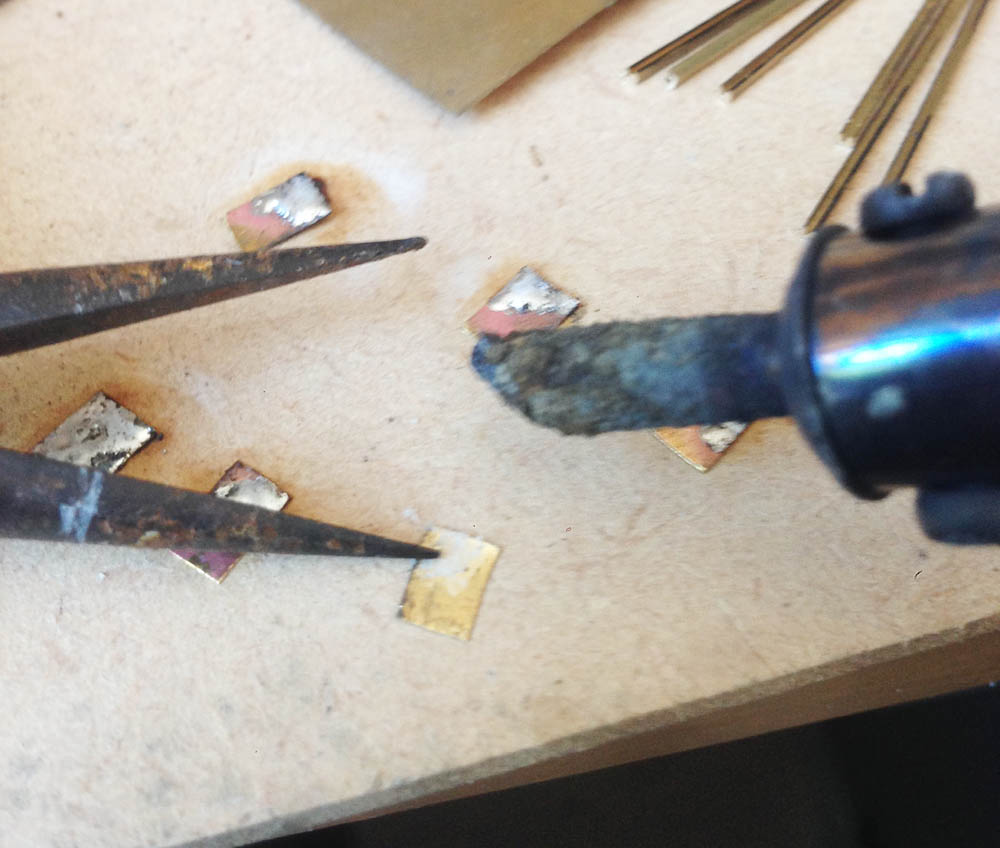
The grey one in the pic above is a leftover from the lower level so you might note the subtle difference in size that looks quite good now that these are installed. The posts were nipped to length wth side cutters and filed square-ish:


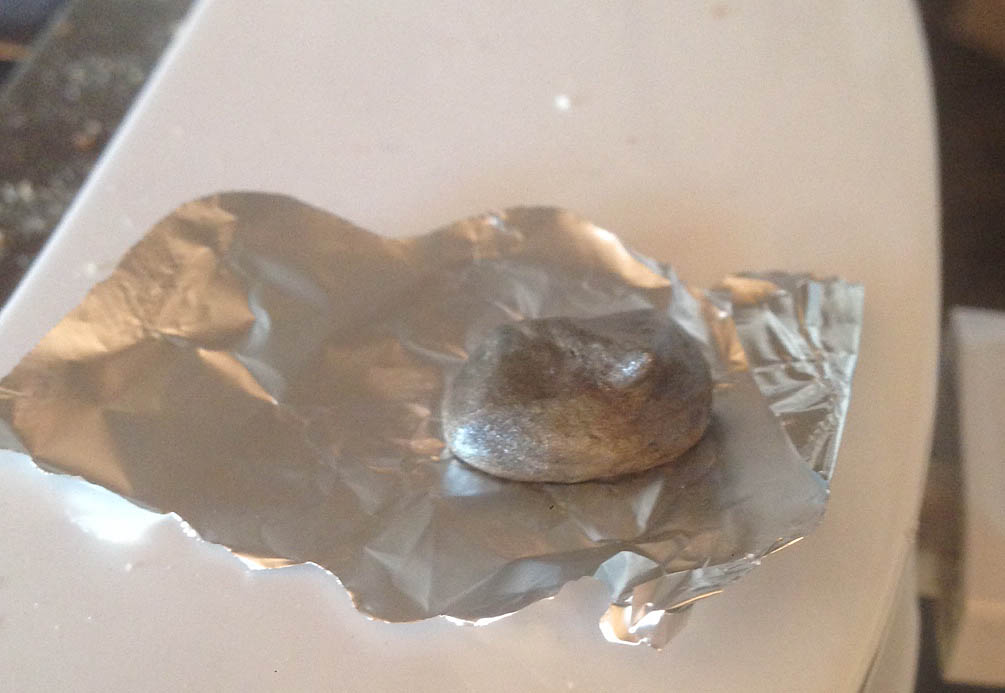
Posts and bases were wiped with flux, tinned...


And attached together with some heat from Mr Soldering Iron (it is hard to remember to take these pics while building, and with only two hands at my disposal):

The assemblies were painted with a grey primer that works well enough as a final colour for me.


The brass bases of these were contact-glued on to existing tiny plastic squares on the layout which were installed some time ago. This way, ballast could be laid around the squares before the poles went up, yet leaving a small patch of flat level surface to glue the poles to later. 

Friday, July 27, 2018

The ugliest backdrops ever created...

After much procrastination, I've decided to complete the white foamboard backdrop around the layout. As you can see, the prefab scenery panel in the middle of the top level was removed so that the backdrop could be painted behind it.

This was painted a sky-blue-ish shade... and despite me using some putty to smooth minor imperfections in the joins, I'm a bit bummed that you can see them more clearly now that the blue has been installed. This may be because of the directional lighting coming in from the right...

I also used a pretty crappy brush while applying the blue which has left some horizontal strata that also picks up bright light sources from above. Drat. Definite blue-fail.


On my last layout I experimented with super realistic photo-backdrops but here I've moved to the opposite extreme and really dumbed things down. I didn't even graduate the blue with white towards the horizon or pop any clouds in... Because Switzerland's weather is always perfect blue skies... Not.

After the blue had set, some green paint was mixed with the sky blue colour (distant things almost always inherit a bit of sky colour) and this was used to paint some rudimentary 'hill forms' behind where the scenery will be. I then used the green (which is a reasonable approximation of my pine tree colours) to vertically daub on some distant 'trees'. These are not intended to be representations of anything specific, but break up the solid colour of the 'hills' in the distance.

As you can see below, this is pretty ugly when viewed au natural...

However with the prefab scenery installed in front of it in the picture below, you can see how the ugly duckling is transformed an appropriately vague backdrop rendered in appropriate shades of nothingness that doesn't scream at you. For once, I completed painted the backdrop all around the layout, even to the ends which don't have much scenery on them yet.

Other than the messy blue I think I've gotten away with it.

With the backdrop not even dry, the prefab scenery was finally glued into place so that some overhead wiring poles could be installed on the top level of track..

Friday, July 20, 2018

Cleaning my slow and hot-running Marklin 88483

As mentioned previously, I have two Marklin 88483 'Class 152' locos that were turned into BLS 485 and 486 locos a while back. One runs pretty well, one is quite slow and runs very hot. Not ideal for double heading them....

The motor on the slow fellow seems to spin ok, but both the truck (bogie) innards are stiff to move, whereas on my other loco of the same model they run more freely.

So, fearing the dreaded HOS (hardened oil syndrome), I decided to take the trucks apart and wash them in some isopropyl alcohol (ironically, here in a wine cap).

 The gears, axles and wheelsets were disassembled and dunked for a while in the isoprop.
Then cleaned off, reassembled and lubed gently. There seemed to be a bit of old oil about before I started, but I didn't get the impression that it was obviously sticky or congealed.
And a test run.... Unfortunately my cleaning hasn't solved the warm/slow running. I might swap out the trucks with the other unit to prove it is the trucks that are causing the problems. Drat.

Monday, July 16, 2018

Wassen Church - 4 - Details and Knobs.

More churching...

Windows were added behind the open cutouts. I darkened some styrene with a black marker, scored appropriately (which revealed the white styrene underneath) and attached these in the window openings.
Also visible on the tower are some shutter-like openings which were made from grilles off an N scale US EMD diesel shell.
My second attempt on the roof dome was layers of styrene. The centre stick was used to hold it while the shaping took place.
Shaped with knife, files, and sandpaper after a little Squadron putty was used as a filler where required. I eventually got to be OK with the shape and attached it.
And with a little paint it's almost looking passable as a copper knob. The roof tiles were painted brown (similar to their original embossed styrene colour), and the walls a slight off-white (white with a tiny touch of brown) .

Friday, July 13, 2018

Wassen Church - 3 - Tower

Work on the church continued with the creation of its tower based on the VGB Gotthard book picture that is serving as my 'plan'. After looking around for an appropriately 7mm square piece of suitable plastic, I just made up a long box of thick and thin plasticard thus:


The ugly innards. This image is unlikely to appear in the Oxford English Dictionary beneath the definition for "Right Angle".


But it looks OK from the outside. As you can see, I had a go at rough forming the square-onion dome that goes on top of the tower from FIMO with the intent of shaping it properly with files after it had set.

Alas I found the below in the toaster oven later. Hmmmm.
How deflating.

Tuesday, July 10, 2018

Wassen Church - 2 - Roof

So with a recharged phone battery, here is where I left things yesterday, having assembled the side piece and plonked it on the hill to have a look at the scale. Overall I think its not too bad. Probably could have been a tad smaller, but it will do.


Back on the workbench, I finished off the eastern end with its bevelled walls, and started on the roof. 

The main roof was fairly easy to place, even with the links which were scored and folded to minimise joins. Material was an embossed styrene with a random brick/stone work pattern originally intended to be the sides of the big viaduct, but it looks ok here.

The beveled end's roof was far more tricky. I started with the end section.....

 And then filled in the gaps.
This might look less than precise in these closeups, but it looks pretty decent from a proper viewing distance it looks ok.

The last major component still to be added is the tower.


Not too bad though.

Sunday, July 8, 2018

Wassen Church - 1 - Walls

Visible from all around the area, the signature building in Wassen has to be its baroque catholic church - St Gallus.

As seen during my final visit in August 2018...
Built in 1734 (yes, it is almost 300 years old), it is probably the most famous church in Switzerland, being visible three times on an ascent of the Gotthard Pass north ramp by train.  You see it above-back on your right as you skirt the Reuss River after exiting the Kirchberg tunnel on the lower level, then again below you on the right as you cross the big viaduct on the middle level, and lastly on your left from the upper level as you trundle past the command post.

On the layout, employing a form of forced perspective (except that the trains don't get smaller when further away on the layout), I need to make it a little smaller than scale size as otherwise it would overpower the scenes.

And obviously, me being me, I don't have any plans or measurements to work from.

However there are a vast number of pictures that cover the three sides of the church that are easily visible to photographers, and despite Google's unusually-intermittent coverage of Wassen, street view does provide views of the fourth side from the motorway.

Having debated this sizing and placement in my head for some time, I figured that making a model using the telephoto side view in VGB's excellent Gotthard book as a 'plan' should look about right. I'm hoping it won't be too big to overpower the scene, but not too small either when a train passes behind it on the middle level.


So  start was made per the above, cutting out some sides in plasticard. I used 1mm thick sheet because the walls are quite thick as you can see looking at the church windows in the picture.

After some marking out, the round windows were drilled out, and the tall ones drilled and then shaped with a sharp modeling knife.


As the side (with the tower) in the book photo won't really be visible on my layout, I decided to spend more time on the 'other' side first while my Enthusiasm Tank was fairly full. The well-known 'front' was also built and the front door portal arches are being cut out from the lower-left piece of plastic in the picture above.


So it looks like it's all coming together reasonably well. Now to belatedly put it on the layout to see what the sizing is like. It was here that my phone ran out of batteries, so that will have to wait for a later instalment!

Monday, July 2, 2018

The insidious onslaught of green

The first layers of scenery continue to slowly spread across the layout.

Up on the top level, I needed to put something under my section of prefab scenery before gluing it in place permanently. As you can see below, some brown has been glued down beside the ballast. 


Those little squares where the catenary poles will go were painted as well.

A little green grass has been laid around the middle tunnel on the top level (next to the prefab scenery gap) and in the flat area on the right of the middle level, as well as a few other touchups.