Friday, May 25, 2018

Loo-paper scenery

I mentioned in a distant post (in the distant past) Mr Marklin-of-Sweden's waterfall scenery with toilet paper.  That sounds a bit odd as I re-read that. Anyway, I tried the concept a while back as an experiment, although I classed it up a bit by using table serviettes/napkins (available for free from cafes and kitchen cabinets around the world!) rather than bog rolls. 

The basic idea is similar to that for glueshell scenery (i.e. apply paper with diluted PVA so it sets hard), except as these papers are a bit flimsy, so they get applied on top of an exisiting scenery skin rather than bare scenery ribs. 

If I recall correctly, Mr Sweeden was using this technique using balled up wads of loo paper as a crack and crevice filler (ha, there has to be a joke in there somewhere), but I experimented with using the idea as a lightweight rockface up on part of the third level's middle tunnel. Sorry I can't remember the tunnel's name, and after a few too many fizzy wines, can't be bothered looking it up for us all. Hopefully this story flow won't suffer too much without the actual name and this mild digression.  Oh, I see it already has...

Now where was I... Oh yes... Sommelier! Another glass please!

With the jury still out on my previous small-tunnel-rockface-trial, I thought I'd go mad with some leftover PVA glue yesterday after scenic-shelling the church hill (in the pic below under the bowl of glue) and some of the South Hill Hole that I mentioned in the previous episode would be the last to be filled up. Quite the Trumpster aren't I?

So anyway, (and boy has that cheap champers impacted the quality of this blog) your writer applied a light wash of the aforementioned leftover diluted glue to the existing scenery shell with a brush. Not a lot, just enough to attach the napkin - which us usually actually made up of 2-4 layers of thin folded paper depending on how you've cut them up. Once the paper is in place here you dab your brush in glue and liberally apply to sod the towels. To coin a phrase.

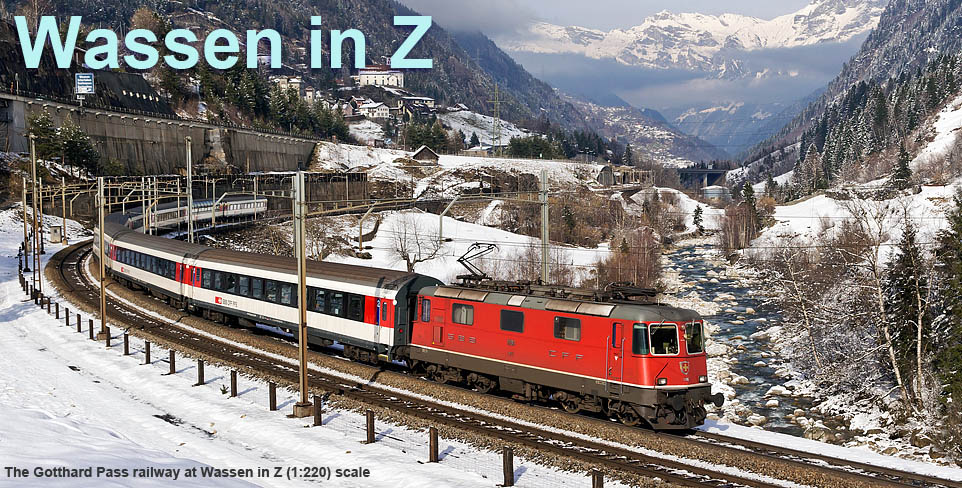
While doing this sodding, you can 'bunch up' the paper layers with your brush tip to give the rockface some texture. Most real sedimentary rock provides horizontal textures from its layers, but must of the real Wassen's hard rock cuttings seem blasted out, and have more 'vertical' textures. I've ended up in these impatient experiments with a mix in all directions, so some of these cuttings look like they have a bad case of varicose veins. 

Still, surely a coat of paint the next day will make everything look better....

Well, maybe not, but the judicial application of some vertical streaking in subtle shades of grey (el-cheapo 'black' and 'white'flavoured kids art paints) has at least helped matters somewhat. When viewed from a distance. With your eyes shut.

We'll see what it looks like tomorrow when the paint has dried. And failing that, when some scenery has been added to hide them.

Those trains still haven't moved. 

Tuesday, May 22, 2018

Steel Shims

I received another second-hand telescoping steel wagon (UIC classification of 'Shimmns' I believe, which is probably the French or German word for "steel wagon") on yesterday's owl.

While preparing to weather it up to match the two already done, I pulled out the brown DB one that hasn't seen any love yet, and decided to give it a repaint.
New blue SBB and DB brown Shimmnses.
As the SBB ones are a shade of greeny-blue,  dabs of green and a nasty blue watercolour paint were squirted onto a makeshift palette, together with some white, in case things needed to be lightened up a little:

A little blending (I probably over-lightened it):

Close enough for government work:

Some weathering was added after looking at a few prototype pictures, which revealed that the real things are a real mix of sun-bleaching (particularly on the raised bits of the ribbed sides), but also are covered in coal dust and carbon (from the overhead presumably) in the crevices.

As before, this was approximated by drybrushing the bogies with some brown, and washing the body with thinned black and some streaks of browns and light colour. White soft pastel from the "Tamiya Weathering Master" box was applied to the ridges of all four wagons, as can be seen in the mini-mini steel train below, which is passing the Transwaggon train which doesn't seem to have moved far over the past few weeks!

Saturday, May 19, 2018

Plodding along

After procuring some little trees and other little supplies from a distant hobby shop yesterday, a rare visit to the trainroom yielded an appropriately little dollop of progress this afternoon.

Although not entirely prototypical (but then again, the real township is less spatially-challenged than my model) I decided to remove my highway overpass -as foretold in a previous post - and replace it with a tunnel portal to give my mini-Wassen-church-hill the impression of more hight.

A portal was constructed from my diminishing stocks of slate roof material and tested for clearance - of which there is minimal...


And then some skinny strips of card used to flesh out the hill after the innards were darkened. 


I'm feeling this will work better than the previous ideas for this wee scene. It's not prototypical, everything is smushed into a tiny space, but such is life when you are building Wassen on a Door. The far end of this tunnel (and its not that far) isn't that easy to see, so will probably remain cavernously open so I can stick a hand in for track cleaning.


Finally, a little paint was splashed onto the parts of the south hill and the nearby top-level adjustments which had a glue-and-yellow-pages shell. The hole in the corner will be the last one on the layout to be filled, remaining open for testing and cleaning until the thing is deemed as bulletproof as its ham-fisted builder can certify.