Showing posts with label Marklin. Show all posts

Wednesday, July 24, 2024

Marklin Re 6/6 - 2 - pantographs and weathering


Can the superb new Marklin Re 6/6 be improved? Of course! 

The chunky pantographs were quickly unscrewed and disposed of.

Looking at my pictures of Re 6/6s, the roof seems fairly silvery where it meets the red sides, and then usually dirties up on the top, especially around the pantographs. I assume they stay cleanish on the sides due to the train washing facilities. So the grey roof on the model was painted silver, except for the bits between the pantographs - because I knew I'd be making them dirty soon. 

Some brown Tamiya panel line accent was dabbed onto the roof's side grilles as I've seen a few pictures of these looking lightly rusty, and I thought that might be something different to do in terms of looks. In hindsight I'm not sure I'm crazy about this and will probably go back over them with black accent.

Various shades of grey, dark grey and black then found their way onto the roof. 

The aerials above the drivers cab (radio and GPS I assume) were painted very light grey. Nice that Marklin included these, and the UIC plug (?) between the front windows is already white. I put some Tamiya Smoke inside the side windows to darken them down a little.

You probably can't see it in the pictures, but I also added tiny red vertical strips between the main front silver window frames and the curved corner windows. I did the same on the Re 4/4.

As mentioned yesterday, the little side details between the bogies (air tanks and boxes) were very lightly glued in with come contact adhesive, as were the cowcatchers. I note that there is an ETCS shoe cast into one each of the side details between the bogies - attention to detail! The lower half of the bogies and those details were washed with a little brown. Most of the 4/4s and 6/6s seem to actually have grey weathering on the bogies - perhaps from use of sand on the way up and composite brake blocks that don't produce as much rusty-dust on the way down??

A little bit of this brown and grey ended up on the sides of the loco. As I have a second 6/6 on the way, I figure this one can be the 'second loco' behind an Re 4/4, and the other 6/6 will 'lead' a train with a 4/4 behind it. As such, I decided I would gunk this up a little more and add a little more detail (including a front cowcather/pilot) to the leader.

As with my 4/4s, it will be nigh impossible for me to change the side numbers and town lettering, but I could change the crest on the side. I was looking for a yellow one, but then found this number, ten less than 11666. Pic below from Christoph Herni on Flickr. I did attempt to change the numbers on one side with a blob of red to change the 6 into a 5. Not worth it! I painted blue inside the crest frame, and put three angled white lines across it.


After I'd done most of this, I added a set of etched pantographs.

So here is a closer pic:

And as it looked yesterday:


I'll probably revisit this again tomorrow and clean up a few areas. 

Other things I might add to the 'lead' 6/6, once it gets here, include side mirrors, maybe a front step, that door behind the cab on one side, the little white triangle on the cab side doors, maybe some sun shades ...and a driver!

Tuesday, July 23, 2024

Marklin Re 6/6


Good things come to those who wait?

It's been a long wait for the Marklin Re 6/6 (announced more than two years ago), and for me, it's been an expensive exercise. 

I feared I'd missed out when the one ordered at the NZ dealer came back as "item on backorder', so I ordered a second one from Z Scale Hobo. Plus a '175th' SBB livery Re 4/4 with a can motor, as I'd heard the new can motor locos don't run well with the old 5 pole cage motors. Plus a few new wagons with both locos. I'd better get a lotto ticket to pay for all of this.


So. A new design of white Marklin card box, and out pops Re 6/6 11666 “Stein am Rhein”, Marklin's item number is 88240.

 It looks fabulous. The Re 4/4 was a superb model (except for the pantographs as have been mentioned in the past), but this is at another level. Freestanding handrails,tidy roof detail, detachable front skirt/cowcatcher/snowplows, and most importantly, this is the first of my Marklin Z locos where the chassis 'looks right'. Large diameter, nicely spoked wheels, a prototypically spaced wheelbase so the body doesn't overhang much at the ends, and most importantly, the body is hunkered down on the chassis in a way the Re 4/4 could benefit from. Not bad at all.

The pantographs, while still clunky, are painted black, which reduces their visual impact a little. I believe this is one of the first Marklin locos that doesn't take current from the overhead, which might upset some people with existing layouts (it doesn’t bother me). Given this, why not provide some fine injection moulded plastic ones in the box?  One folded up, one down (and several spares of each to allow for breakages!) I'll be replacing mine with etched examples.


Compare the 6/6 and 4/4 bogies/trucks/drehgestell). On the real thing these are almost identical.

A proper Re 10/10!

Popping the top off, the innards look quite different to the 4/4s (even the new can motor-equipped 4/4). The body seems to be cast in a lightweight light coloured metal (? but it feels a bit like plastic).  The pickups from the two end bogies are thin wires. I'm not sure if that is a good thing (no rubbing copper strips to get dirty) or merely something that can break. There is now a long circuit board on top. The little air tanks and boxes between the bogies clip in and out (and surprise you by pinging onto the floor the first time you take the shell off). I'll probably glue them to the chassis. The printed boxes and things on the side of the light grey chassis can be seen through the side windows to provide some interior detail, which is a nice tough, and there is cab interior at both ends. Again a nice touch, but that leaves little room for extra weight. 

As god intended:

So how does it run? This is the first Marklin loco I have with the new ‘bell armature can motor'. It’s quieter and smoother than the old motors, but not as smooth or quiet as the Rokuhan unit I have. It was also reported to be a bit faster than the old motors  - why didn’t they change the gearing so it would run with the old 4/4?! Grrrr. Then I further bolstered Marklin's coffers (voting with my wallet for poor decisions) by buying the 175th livery Re 4/4 which also has a can motor. Despite the top being of no use to me as that livery came out in 2022, after the Gotthard base tunnel opened.

Side by side, the two can motor locos run at different speeds anyway, the 4/4 a little faster, although they run together OK. 

I'd also read a review saying the 6/6 was a bit light and wimpy, but I ran th 6 wagon boxcar train with no hassle behind the 10/10. The 620 was a bit jerky in places. I was surprised. It's a brand new loco, so it should be clean, and I cleaned all my track. Almost as if it was losing contact with the rails in spots (wonder if there is enough vertical movement in that middle bogie) and it felt like it got 'tired' the more I ran it!Maybe I just need to re-clean a few spots on the track. It certainly wouldn't hurt either of these locos to have a bit more weight.

So the 10/10 ran well enough other than the occasional herkey-jerky, but with two locos they tended to get past any bad spots. I swapped out the red and cream 175th livery top for one of my red tops for the video.

This first "running session" on Wassen in many years was a mixed bag. One of the levels of loops in the north end hill is too close to the scenery and the Transwagons (and other long wagons from the marks on the inside) scrape inside the paper mache, and on one occasion, they caught and derailed the train. Good to know, as I'm sure that can be fixed. 

I then noticed that the new 6/6 ran at a similar speed to the old-motored 4/4s (Grrr!!!) so ran a big container train behind them, which ran reasonably well given its length. One container wagon caused a derailment by clipping a plastic tunnel portal (which was then opened up slightly with a knife blade). I also need to add more vertical clearance on the north loop somehow, as my nice pantographs were getting snagged. The points up top of the south hill seem a bit sketchy in terms of power delivery, which is a pain, but two locos will generally power through them. 

With the long train of light wagons and little wheel flanges, sudden stops and starts cause derailments. As does backing the train for photo ops. So the session was a bit frustrating.  I need to sort out some of these issues or the layout will just be an exercise in frustration. Fortunately, now that I've identified a few trouble spots, they can be fixed.

A few videos might show up if blogger gets around to processing them:


Friday, March 6, 2020

The Re 460 pt 2

Finishing up the Re 460, I added some air hoses on my new lower chin, put a dab of red and white paint at the top of each hose to represent the operating cocks.

I also added a 'p' shaped fold of fine wire as a coupler and folded up some pantographs (remembering at the last second to put the 'up' one at the back). Yes, while the 460 originally had this style of panto, they have over the last decade or so been fitted with single arm top halves rather than the split arm  triangular style on most of the other stock that I had etched up.


Not too shabby. The white window blind is quite visible on the front-on pic. I suppose it should have been a slightly creamier colour.

While looking at these pictures taken with my 'proper' camera - as opposed to the pics from my 8 year old iPhone that usually populate these dispatches, some impressive details on Marklin's model revealed themselves. Not only is the correct name 'Säntis' clearly visible in the full sized pic under the driver's side window, but the Pininfarina logo is also in place on the other side.


Neither of these I've seen with my naked eye before, so I must say, well done Marklin, this is a far better model than I expected it to be.

At some stage I might fit some lead weight into the top of the body in the hope of going it a bit more grunt on the hills.

Saturday, November 9, 2019

Marklin's Re 4/4 - Improving the looks - 5 - Finito


Stock vs improved Marklin Z scale Re 4/4
A few small tasks completed this 4/4 project:

  • A small knob of white paint was slopped between the front windows on the UIC plug
  • The 'step/platform' protrusion (above the starboard buffer) on the front edge was painted gray to match the prototype (it was silver on the model)
  • Added the pantos of course - these looked to be sitting a tad low on the dry run, so they have been raised up further on some tiny rods of styrene
  • A dash more weathering was applied to the roof and pantos. As previously mentioned, the 4/4s are kept fairly clean so I decided not to weather the sides and front.

One small irk remains the front silver-edged windows, which on the model have square corners on the outboard side rather than curved like on the corners facing the middle. I suppose a little dollop of red might sort that out but there is a high probability of making a mess doing that. I suppose I should add the rear-view mirrors on the starboard corners too. Someday...


Is all this worth the effort given that the trains will typically be viewed from a distance? Hard to say. While the stock model looks pretty good, the revisions do improve it. The silver roof and scale pantographs do look good, but now the Z scale flextrack looks awful!

I will have to be very careful with those pantos - its easy to forget they are there when you can hardly see them.

Thursday, November 7, 2019

Marklin's Re 4/4 - Improving the looks - 4 - Roof

Most of the SBB Re 4/4s that I saw on the Gotthard were clean enough to see that they had a silver/light grey roof:


Whereas the Marklin ones have the same dark grey used at the base of the body. This isn't a terrible faux-pas because the roof weathers with carbon from the pantograph over time, but I felt that painting the roof silver might make an improvement visually.

Before that was done, the bolt hole for the Marklin panto would have to be filled in.

And indeed it was with a rectangle of thin .010 plasticard; and a square of plastruct ladder that had been thinned down a little was attached to the top of this to 'lift' the new panto off the roof a little as the real one is. My structure isn't entirely prototypical but I think it will look fine when the etched panto is glued on top.


Then I decided to bite the bullet and paint the roof silver - a risky endeavor that could end very messily, but with the aid of my magnifying light and a very subtle demarcation line that exists on the shell, it wasn't as hard as I had feared (although in these harsh closeups it looks like I need to touch up one bit that I didn't notice with the naked eye):

Per the prototype, you'll see that the larger grilles were left the Marklin gray colour while the center one was silvered up.


In the above pic you may note some thinned black added to those end grilles and in various shades to the roof as the first step in the weathering process. There seems to be a distinctive pattern to the Re 4/4 tops, with the dark panto-droppings down the centre, and often a little rust on the sides of the cab roof. The locos must be cleaned fairly regularly, as other than the tops of the roof and some occasional fading of the red, most 4/4s I saw at the time were in reasonable nick.

After this pic was taken, some dullcote was sprayed on and chalks applied to make the effect more subtle. More on that tomorrow.

Friday, November 1, 2019

Marklin's Re 4/4 - Improving the looks - 3 - Pantographs

The very day I received my Re 4/4s, a plan was hatched to replace the big ugly Marklin pantographs with finer, non-functional, etched examples.

Sure, etched ones won't go up and down and they won't collect current, but... I don't need them to. I just need them to look better.

As can be seen here, the real things seem almost invisible:


A tad finer and more petite than the model below. Note that the big current collection shoe is almost the full width on the model compared to the proto:


To be fair, the Marklin panto had to be engineered sturdily-enough to operate up and down consistently over a long period of time in the gritty and dirty hard knocks world of model railways; and be wide enough to collect current over the imperfect, tight, wobbly track and catenary setups that are possible on Z scale layouts. Although I'd wager that only a handful of people actually use the overhead current-collection option on marklin layouts. Indeed reading between the lines on a recent Marklin release makes me wonder if they may drop this option in future.


But be that as it may... the plan was to etch some replacements, and the above was drawn in Sketchup eons ago based on a closeup crop of one of my pics:


And after several years of sitting on this, I finally got a mate who is good at this sort of thing to set it up and get a prototype etched in Phosphor Bronze for me by PPD in Scotland. This material is stronger than brass and should be able to take the inevitable bumps and knocks better.


Well, don't those look fine and dandy?  I don't own any 'Blacken-it' chemical etch or gun blue, so applied a low-tech Sharpie black marker pen to them instead before getting out the pliers.


Folded up:

It took about 5 minutes of prodding with pliers, tweezers and confused looks to do this one, so I will refine my technique as I become more familiar with them, which will result in a 'neater' appearance as I had to bend and rebend a few things.

 The phosphor bronze is certainly much more forgiving than brass, and much stronger indeed. You may notice that I folded the lower support strut the wrong way too...


It certainly looks a bit more scale than the old ones... More fiddling will follow.

Thursday, October 31, 2019

Marklin's Re 4/4 - Improving the looks - 2 - Pilot/coupler

The next obvious thing to tackle on the Re 4/4 is the couplers situation...


Now I'm actually OK with the big, horny, clunky, Marklin coupler in general. It may not be pretty, but it does the job. Changing them all to Microtrains would be a big time-suck and an expense for little improvement in looks and no improvement in functionality - indeed they'd probably be less-reliable with my luck. 

As for their clunky aesthetics, I don't actually think people will be peering up close between the wagons on a layout like Wassen, so the only horrible Marklin coupler that it really makes sense to fret about is the one at the front of the train, as that is where most people look.

Obviously I don't need a coupler at the front of a lead loco, as I'm not running around trains or doing complex bidirectional shunting moves (I doubt many people are in Z scale...)  But most of my trains are double-headed, so some locos need couplers at both ends.

So the plan is to remove the coupler from one end of a few of my locos and replace it with the 'pilot/headstock/cowcatcher' at that end.

If this was done cleverly, the pilot would be attached to the chassis rather than the bodyshell. This would allow shells to be swapped out so that, for example, my blue SBB Cargo 4/4 might sometimes be seen in the lead and might sometimes be the second engine.

So one of the bogies was detached from the chassis and it's coupler removed. Some of the cast-on pilots and a little extra plastic was removed from the front corners of the bogie to provide more clearance between the bogie and my new pilot while swiveling. You can see the angled pilot faces carefully glued to two rectangles of styrene in the corners of the chassis below.


This means there are no issues with bogie clearance, but if there is a collision, the thing is going to come adrift. Perhaps some tiny screws in the corners (or even some brass rod) through the chassis and into these blocks might make things more likely to survive future altercations.

The curved corner pieces being made up from styrene pipe:


And attached in this blurry pic:


A few bits of (grossly oversize) brass wire later:


Hardly dramatic, but it looks a little better closeup. Next time the detailing might be a little finer...


Marklin's Re 4/4 - Improving the looks - 1 - Inside

As you may have noticed, I tend to model at a million miles or an hour or at zero.

The ETR 610 has made some progress, but it hasn't been a tsunami of progress that keeps me motivated. It has instead moved very much from one stumbling point to the next.

So in the hopes of restarting in Z for a short while, I have had a number of ideas on the back burner to improve the looks of some of my locos.

Let's start with the Re 4/4. For Z scale, this really is a superb model that is crisp, well-detailed, well-painted, and most importantly, conveys the look of the original with only a few compromises to fit with the Marklin 'system'.


Two main things stand out as needing improvement:

  1. The massive silver pantographs - these look better in the factory dark chrome on my BLS locos but I expect one could do better...
  2. The massive coupler sticking out the front.
In addition there are a few quick and easy cosmetic things that could also be tried.  For example, Zettzeit.ch has some 'machine room' interiors that you can print out and install behind the three large side windows.


You print this out so that it is 35mm wide (I stuck a few together in Photoshop first to print off a bunch in bulk) and ... there you have it. 

The jury is still out as to whether I like these or not. Might have to try a few that are darker ( I may have lightened them a bit much in photoshop).


Friday, July 20, 2018

Cleaning my slow and hot-running Marklin 88483

As mentioned previously, I have two Marklin 88483 'Class 152' locos that were turned into BLS 485 and 486 locos a while back. One runs pretty well, one is quite slow and runs very hot. Not ideal for double heading them....

The motor on the slow fellow seems to spin ok, but both the truck (bogie) innards are stiff to move, whereas on my other loco of the same model they run more freely.

So, fearing the dreaded HOS (hardened oil syndrome), I decided to take the trucks apart and wash them in some isopropyl alcohol (ironically, here in a wine cap).

 The gears, axles and wheelsets were disassembled and dunked for a while in the isoprop.
Then cleaned off, reassembled and lubed gently. There seemed to be a bit of old oil about before I started, but I didn't get the impression that it was obviously sticky or congealed.
And a test run.... Unfortunately my cleaning hasn't solved the warm/slow running. I might swap out the trucks with the other unit to prove it is the trucks that are causing the problems. Drat.

Tuesday, January 30, 2018

Re 4/4ii bogie swivel issues - Marklin Z 88951

As mentioned in my previous rant, I suspected bogie-swivel problems due to HOS cause the periodic Re 4/4 derailments I get around Wassen. And always have - since I started in Z scale a year or more ago.

Somewhat pleasingly, and more surprisingly, I've been able to cure the swivel/sticking and derailments in one foul swoop. And it's not HOS after all!

But Marklin isn't off the hook just yet.........


To back up, there have always been half a dozen spots where there have been occasional derailments with my SBB red Re 4/4s. Most of my early videos end exactly where they do because in the next frame an engine derails followed by me swearing.

I had begun to accept that tolerances in Z were so tight and the locos just not flexible enough to rollercoaster over my badly laid track (from three manufacturers) on its undulating (and flexing!) foamboard substructure. I feared a future of constantly tweaking track and turnouts with a growing fleet of blacklisted locos and wagons.


A few nights ago you may recall that my suspicions as to a possible cause of these derailments were aroused by the discovery that the bogies on some of my 4/4s get 'stuck' in the metal chassis while swivelling around curves.

My hypotheses was that depending on how the loco was tracking at a particular moment (whether pulling a load uphill or not, whether being pushed or pulled at that moment by a loco in front or behind, whether running fast or slow) a bogie might just 'stick' in a tight curve.

This stuck bogie - not being able to swivel further or back into line - might derail the loco immediately, BUT, it might also merely pop one wheel off the rails which will ride along outside the rail in that stuck position for a while until it was forced off by the next turnout or curve. I've observed that 'riding outside' on the layout before, but always assumed it was all due to my bad trackwork.

I seem to have proven that the stickiness was actually the cause of all of this by eliminating it - the fix was stumbled upon while poking and prodding around inside a disassembled loco - initially to see if the pins that hold the bogie in were sticking due to machining errors or HOS.

The breakthrough discovery was that the 'sticking' only happens when the bogies are twisted towards the end of their travel when swivelled clockwise (as viewed from below).


(or counter-clockwise if viewed from above).  They don't stick when swivelled to the extremes in the other direction.

After some disassembly (I pulled the pin out) - it turned out that the sticking happens whether the pin is in or out, so that pin is clearly not the problem.

 Hmmmm...


After some further examination, it appeared - to the imps in my head - that there was either some wear, or perhaps a slight design/casting glitch in a small off-centerline area on the main plastic bogie casting towards its top - the big round plug that mates into the hole in the main metal chassis frame - the two areas circled below - note they are off-centreline:
This is at both ends of the bogie frame (about 10:30 and 4:30 positions - if the coupler is held at 12:00 or 06:00 seen from above)


This glitch reminded me of flash on a mold join, but it didn't look like that at all. But something just looked a little suspect to my eyes.

I decided there was nothing to lose by trimming a sliver of plastic off that imaginary ridge, and making sure I cut in at the bottom to remove it completely - so there isn't any semi-attached material remaining that could bind in gears later. Be especially careful not to cut or bend the thin brass electrical pickups.


After reassembly, I couldn't believe it... the bogie swivelled freely in both directions!!!

I performed surgery on the other bogie, and then on the four bogies on the other two sticking locos. Magic!

Tonight, for the first time, I was able to run my passenger train, behind two Re 4/4s endlessly around Wassen - up and down for about fifteen minutes - with not a single derailment.

What a great feeling!

There is nothing more frustrating than playing model trains with model trains that don't work well. And what a relief that this somewhat expensive experiment in Z scale hasn't turned into a gigantic white elephant.


Speedy Gonzales

Footnote: as stated a few days ago, I have had these derailments due to swivel-sticking issues with three out of five Re 4/4ii locos. I have four SBB red ones (Marklin 88591) and one blue SBB Cargo model (88592). I don't know if all the stuck ones were red as I may have swapped bodies across chassis. I may have just gotten a bad batch. I have never seen a green 4/4 (88590).

I assume that these plastic bogie parts and metal main chassis castings are shared amongst many, many other Marklin 'short' electric and diesel locos; with prototype-specific cosmetic bogie sideframes and tops. It would be interesting to see if this is an isolated issue or common across the many Marklin models that presumably share these parts.

Friday, January 26, 2018

Ranting and raving: Marklin

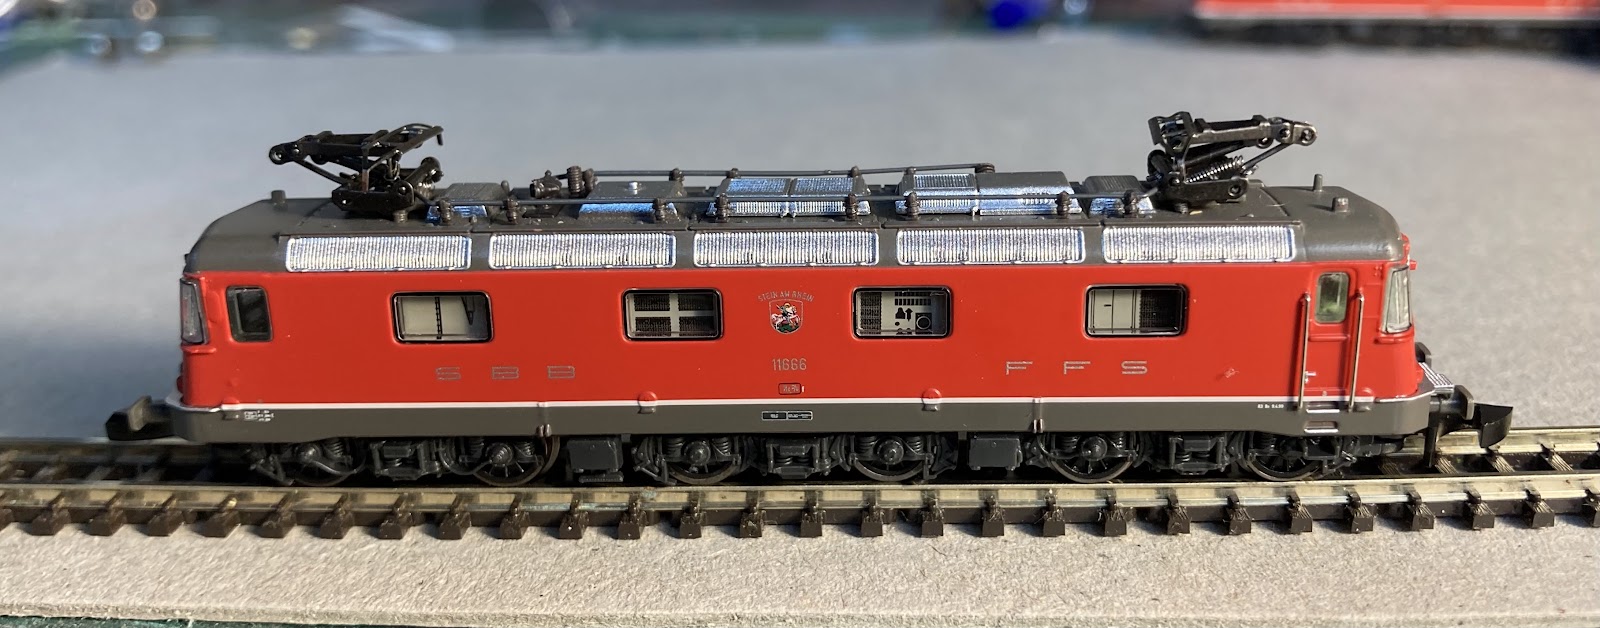
OK, so I sorted out my soldering, cleaned the tracks, got power up and ran a pair of my Marklin Re4/4s around the place to check that the new scenery hadn't impinged upon the right of way.

The good news: all the tracks work, the turnouts work, no real issues with scenery, the pair of locos didn't stutter or run slow....

But there were a few derailments of the trailing loco.

After a lot of fiddling, I traced this to the bogies on it not swiveling freely. If you swivel the bogies to the extremes it would have trouble getting to those last few degrees, and/or stick there in the extreme position. Thus when running into a tightening curve, the stiffness is forcing one wheelset from the sticking bogie off the track as it reaches that point of swivel. The same thing might happen when the loco bogie was trying to unwind itself back into a straight, but sticks.

I have five of these 4/4 locos: one doesn't seem to work at all (a nice surprise!), two have free-swivelers and three have at least one bogie that sticks (including the dead one). The two that swivel freely do run around the layout beautifully, and they seem quieter and smoother than the locos that have featured in previous videos.

Now here's the kicker - these 4/4s are all brand new locos, purchased within the last 18 months. Modellbau-wiki.de says these could be up to five years old, but still.

Marklin locos - hopefully this isn't their natural habitat - on the workbench.
-------------

1. HOS    So one of the reasons that the bogies could be sticking at the extremes is that the tolerances are bad between the bogie pin and the slots in the frame. Another likely culprit is 'hardened oil syndrome'. Marklin used to use an oil that cakes up into a very hard resiny substance which requires disassembly, an extremely thorough cleaning of all the parts, and lubrication with a light, plastic friendly oil.

Now, I have Kato/Atlas N scale engines that I've owned for almost thirty years which have never been disassembled or oiled and they still run like magic....

HOS has been a complaint of Z scalers for decades now - you see this mentioned a lot on forums and on second hand listings, but... why? Why? Apparently the newer locos use a new oil, but what sort of company would (surely knowingly) treat its customers like that for so long? What sort of customer base would accept such bullshit?  Marklin went to 5-pole motors at the turn of the century. Those crappy Athearn blue box locos had them in the 80s.


2. Is that really what the customers want? So I have four red Re 4/4s - with the same road number on the sides of course, because that's how Marklin rolls - and one that I picked up in blue 'Cargo' livery. This was part of a special edition box that came with a pewter-cast copy (non-running of course). The standard engines cost almost twice what an N scale item does in US street value. The special editions cost more. Who wants a pewter desk ornament? And who wants to pay extra for one?! Presumably we'll run through green, red and cream (with two pantos instead of one?) and then the special paint schemes will kick in like the Gotthardo... and red will never be seen again. So it is lucky I happened to get into Swiss SBB Z scale modeling when I did and the red ones were available, because it's possible they never will be again.

OK, I'm new to Z scale, but this is a(nother) thing that irks me about Marklin - once they get some wagon or carriage tooled, they seem to spend the next twenty or thirty years milking it with bizarre paint schemes for collectors, yet few people who actually build layouts would ever want.

As an example, as a new modeler to Z and the SBB, I'd like one of those nice red streamlined Re 460s for my passenger trains. It was produced my Marklin in red from 1996-99, so they're looong gone - and with the old three pole motors anyway. Since then, there have been twenty two 'advertising' editions (one was a red but with an unusual 'connecting Switzerland' logo) plus three blue BLS versions. That's 25 non-red editions!

Surely anyone who wants to model Swiss SBB rail would want a red one, but they are stuck with these special editions that you almost never see on trains in the real world, unless you plump for an HOS-infested 20 year old example. Why not make the commonplace available for purchase once in a while? DB's red class 185 (all over the Gotthard) hasn't been available in red in Z since 2008 and are as rare as hen's teeth.

All model railway manufacturers have gone to small runs, but at least Kato and Atlas re-run popular schemes with new numbers every few years. And they always begin by producing a few numbers for each model to start with. Fortunately, with my four identically numbered red 4/4s, the numbers are pretty hard to read in Z...

Same with passenger and freight stock. My SBB passenger car set that I repainted myself into the current white scheme, is made up of a nice SBB panorama car...  plus... repainted German models -  I assume, as the details don't match the real Swiss cars.

In the freight scene: Intermodal trains are probably the most popular type of freight train in Europe and in 2018, as I type this, you can't yet buy a bogie container car from Marklin. Thats crazy! They'd be sold out in no time. But hey, if you want a bizarre 18 axle torpedo ladle car, or weird loads on flatcars, or a million versions of banana cars, we're your guys!

That makes no sense to me. Don't they want to expand their market by attracting fresh blood into Z scale? Young people typically want to model modern image and run trains - to make in miniature what they see have seen with their own eyes, not model something from the equivalent of the Railroad Circus.

And why are the insides of a loco (under the shell) approx 40% metal, 40% plastic and 20% air? Surely they'd pull better with a bit more of the metallic stuff onboard...? And why can't you sell me spare-parts bogies for me to make my own wagons?!? Grrrrr.

3. Now that's a quality product. DB takes a deep breath and calms down a little...

To be fair, at least one of my 185 'Hoyer' locos which were transformed into BLS 485/6 locos was probably second hand, and they were produced in 2008, so that's a while ago, but they both look in identical condition - clean, no obvious marks or dirt on the wheels, no scratches on the shells...

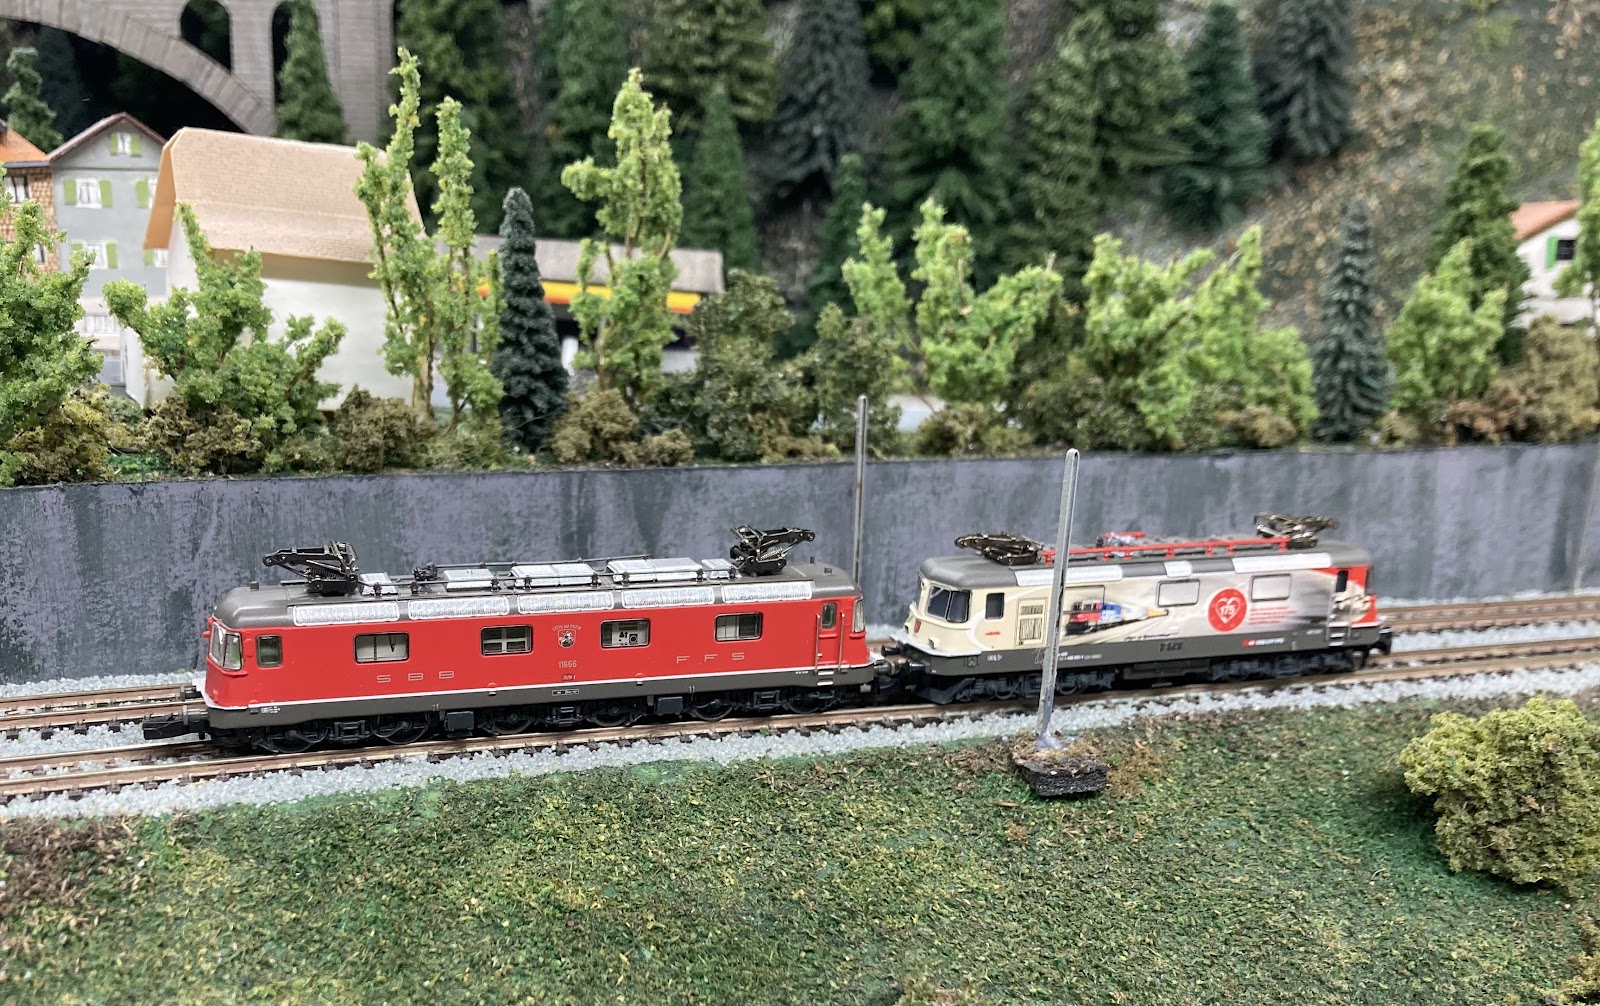
After my success with the two swivelly 4/4s that ran around the layout so well, the BLS pair were put on the track as I wanted to check how much slower 'The Alpinist' was than the other.

'Connecting Europe' was reasonably quick, the Alpinist was really, really slow. Really, really slow and stuttery. After a few seconds there were a few flashes from under the shell and it moved off trailing a disconcerting amount of smoke... but then it was off. Almost to the speed of the other, and close enough to double-head for a few laps. But boy do they get warm - especially the smoker (must be the Italian half of Mr Alpinista). I'm guessing a stripdown and HOS eradication is in order.

But then, just for a laugh, I put on a new engine from Japanese newcomer Rokuhan.

Wow. Smooth as butter, silent, powerful. Wow. Eye opening really.

--------

Sure Marklin have been through some hard financial times, and sure they have to cater to many prototype countries/railways/eras, and sure there is easier money in repaints than tooling new prototypes, but surely Z is their differentiator?

They've owned the Z market for so many decades, but it's never been more than a simmering one - an afterthought in model railway history, and they have been ignoring it foolishly. Surely they should have been putting more effort into it than this?

Newcomer Rokuhan's clip-together track is the best you can buy, and their loco mechanisms seem so far ahead of Marklin.

AZL (and too-briefly SZL), and now Rokuhan have produced superb locos and rolling stock over the past five years.  Will the folks in Goppingen see the writing on the wall and buck up their ideas before it's too late?

Well maybe.

  • My crippled 4/4 models are actually really nice (on the outside, except for those awful pantographs and couplers). 
  • A surprisingly decent-looking range for 2018 has just been announced, including (get this!!) Marklin's first ever bogie container car in Z scale*: the 'sgs' with three 20-foot boxes on board (sgs is a designation I've never seen in real life, but having googled it, it does exist). 
  • They have also just introduced a new 'maintenance free' (brushless?) motor.

Maybe things are looking up.

I hope so.


*update: it's not their first at all, it seems it's a reprint of the same car with different containers - the original was issued in 2003!