Showing posts with label airbrush. Show all posts

Tuesday, November 1, 2016

InterRegio - 1

As you may recall, I picked up an SBB passenger car set recently.

The set is a car or two short of what I would ideally like to see on the layout, although a single loco will probably struggle to pull more than four cars up the hill anyway, so that's moot...

Other than this, the main concerns with the cars are that:

  • they don't run that well 
  • they're in an older paint scheme

Hopefully that the former will be sorted out by my ongoing remedial trackwork tweaks and some adjustments to the unders - I have a feeling that the couplers are catching the buffers on sharp curves on at least one of the cars. Another car 'drags' a bit - as if a wheelset or two is rubbing on something.

The livery issue I'll tackle now - buoyed by the illusion of recent successes on the Habbiins wagons by the 51st Airborne Paint Application Corps.

So looking at the as-delivered models vs the real thing (as provided by the VGB Gotthard book), we can see that:


  • The grey panel should be white (as should the bottom half of the doors). 
  • That silly grille amidships should be removed (its on one side of the models only).
  • The red should extend laterally over a little more than the door 
  • The silver window frames stand out like dogs knobs.
  • The strip amidships along the windows is a dark grey here. It should be black, but I'm hoping I can get away with what's here
  • The white strip up top should be a little taller too (down to the windows) but again, I'm hoping I can get away with it as-is
  • The model in the above pic is a first class car and has a thin yellow line above the windows. This should be painted out and replaced with some yellow in the red door patches that are barely visible on the prototype pic here on the last two cars of the train 

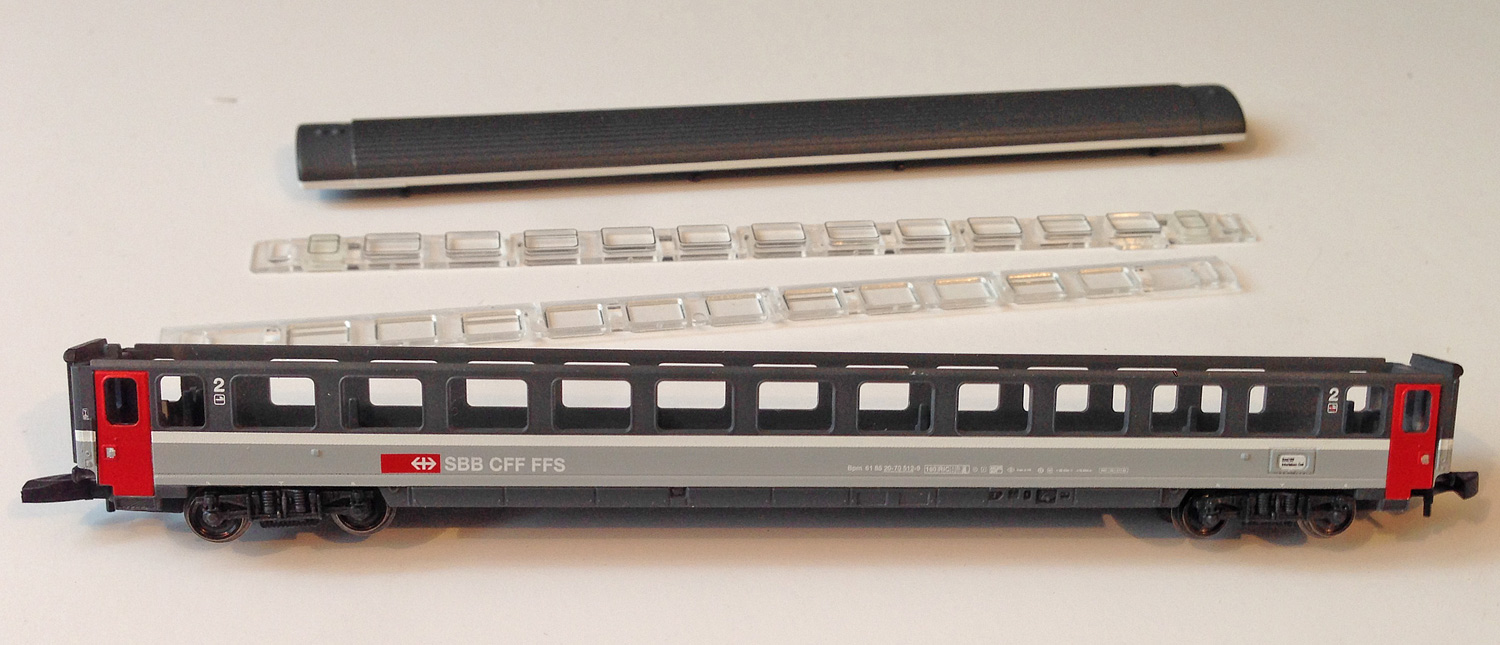
Second class cars disassembled:
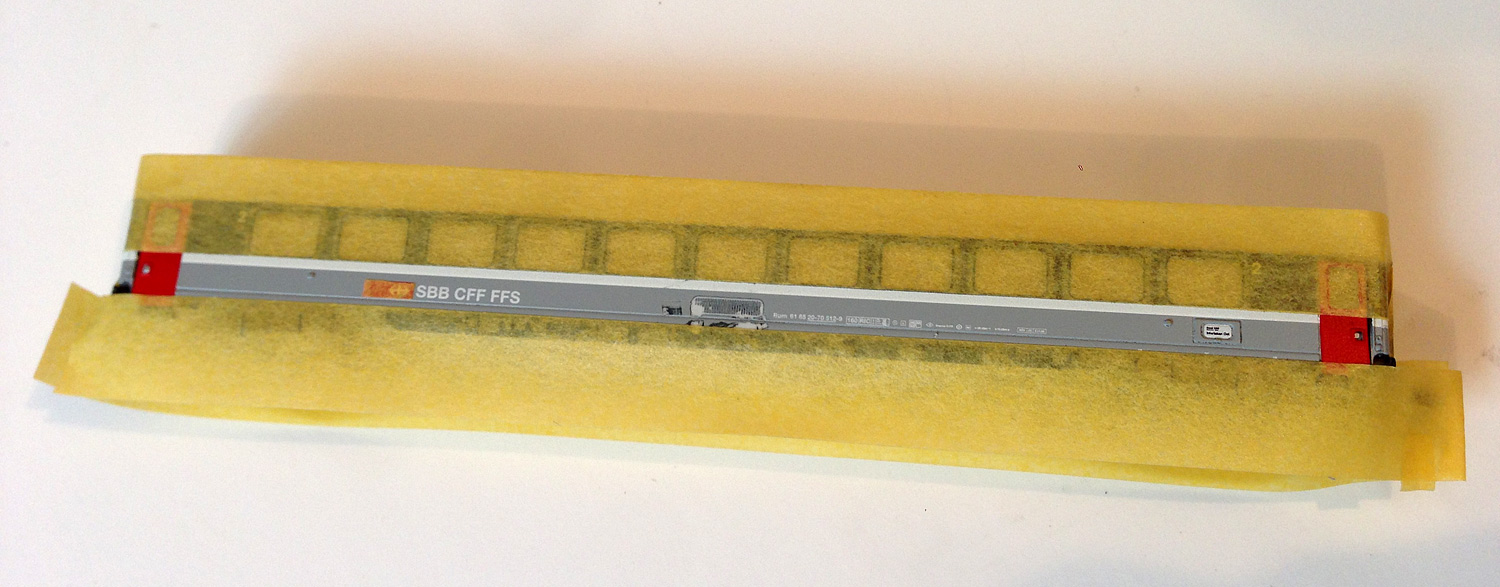
 Masked up (note that I have also masked a tiny rectangle to retain that red SBB logo:
 Some paint was then applied. I used Humbrol gloss white. It was a disaster. Enamel whites often are -all creamy-coloured and thin so that they don't really cover anything with white at all - merely a whitey smokey sticky transparent colour. After some internet research, it seems acrylic flat white is the only way to go, so I headed downtown to procure the Tamiya production of same. Lo and behold: success, with a nice crisp arctic white coat over the grey:
Successful it seemed. But either my masking wasn't thorough enough, or more likely the thin runny Humbrol gloss soup seeped underneath, but I was left with a bit of a mess to clean up with a little overflow around the windows and to a lesser extent the unders:

In the next report,  a 2$ paint set will be deployed to step back from this cliff of messiness.

Monday, October 31, 2016

Whazza Habbiinsing - airbrushing a boxcar silver

Wassen, Dec 2015
Some of the more distinctive trains seen at Wassen were boxcar trains. While there are a surprisingly high number of four wheeled boxcars running around for this day and age, they are mainly of this 23.3m long silver bogie type, of which some (or all, or many) may be of the classification "habbiins" or something similarly mysterious.

Often they run in clumps like the above train (which may be carrying paper), but they will often pop up in general freight trains too. Many have silly yellow "Transwaggon" labels on the side as below, but that's completely reasonable since that seems to the company that owns many of them in these parts.

Tosh-railways is a nice source of pictures of these and other Euro wagons


As seems to be their business model, Marklin produces a range of weirdly painted "collectable" wagons of this style in Z scale, yet they don't seem to make (and may never have made) the silver ones that a Swiss modeller might actually like to buy a few of.

Fortunately I managed to pick up a few older stragglers off ebay that would be suitable candidates for Transwaggoning.

 And with a quick de-topping:


Now I decided to do something out of my comfort zone: use an airbrush to paint them silver. I'm not much of a player in the dark arts of airbrushing. In fact I've only airbrushed one model in my life, but here I am, seeing if this equipment still works.

Before slathering the silver, I thought it might be interesting to mask off a few areas that could allow some factory-painted details to remain.

I've not used Tamiya masking tape before but boy is this stuff great. I used the blue calipers below to measure the width between panels and then cut off a few rectangles.... and applied them as you can see here on the wagon's lower end as it appears in the pic:

The stuff cuts easily with a knife, is forgiving and holds a line well. I taped off the roof centre and end walls on the white PanGas one for something different:

Out with the air blowing equipment: my old Aztek airbrush with a few nozzles that aren't completely clogged up with old dried paint, indecipherable airbrush instructions, a spray booth made from a card box, a nearby window is open to prevent me dying, paint, thinner, pipette, mixer, kitchen towels for the inevitable mess, latex gloves that I forgot to wear:


And a stick to hold the wagons with: old foamboard offcuts taped together:


Work in progress:
 And with the little masking tape pieces removed:
All in all pretty decent. There's still a little of the previous paint showing through, especially on the dark Marklin one.

I could give them another coat, but I'll probably just apply some weathering to hide it.